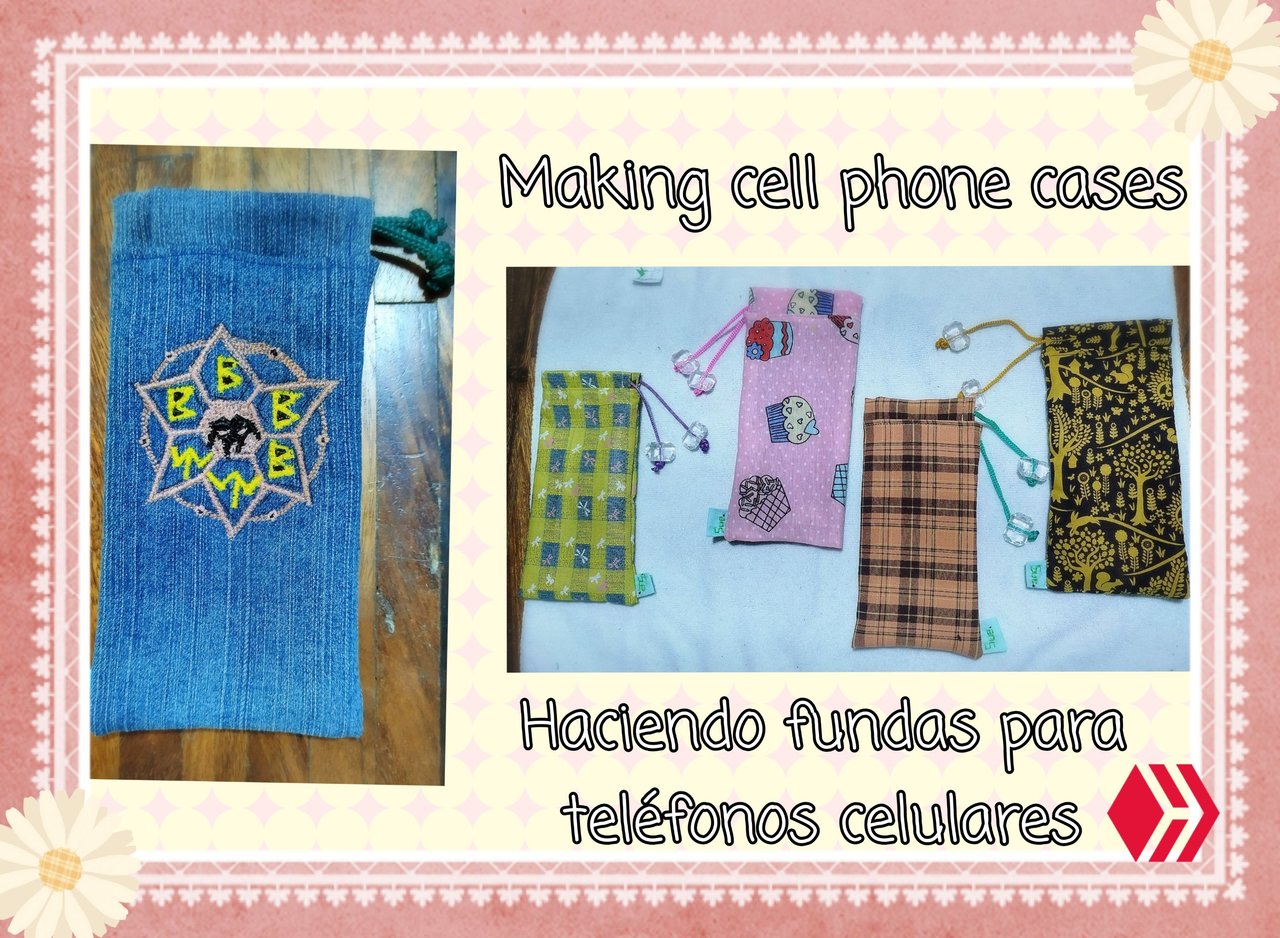
(ENG/ESP) 🎀📱Easy and practical sewing project: Cell phone cases or covers / Proyecto de costura fácil y práctico: Estuches o fundas para teléfonos celulares 📱🎀
13 comments
ENGLISH CONTENT
Hello to all the members of this community and sewing lovers! Today I'd like to share with you a small project I've had in mind for a while: making phone cases. The idea came about after a gift I received a few years ago. A classmate gave me a cell phone case made by her mother, who is a seamstress. I was fascinated by the detail, as I love crafts and greatly appreciate receiving something made especially for me.
The case is made of blue jeans material with an inner lining. I've been using it ever since. It's ideal for when you're going to store your phone, whether in a purse or in your pocket, protecting the screen. I had often seen my mother wrap her cell phone in a scarf or hat before putting it in her purse, and I, following her example, would do the same. So, when I received that case, I realized how useful it really was. Thinking about it, I decided to make a few to give away and take the opportunity to ask those people what they thought about using them 😌
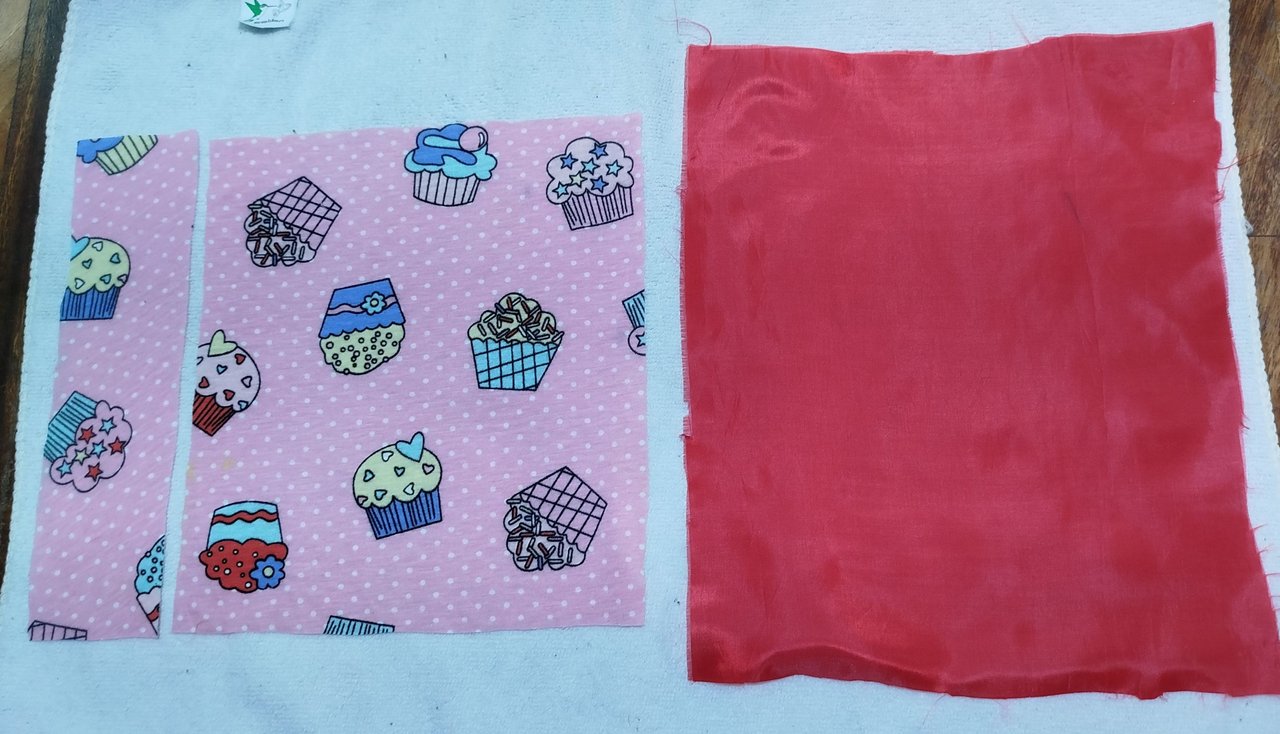
The materials to use are easy to obtain. Just go through our scrap bag or basket and find the ones that look the prettiest. In my case, I selected some patterned fabrics I had leftover from old sewing projects.
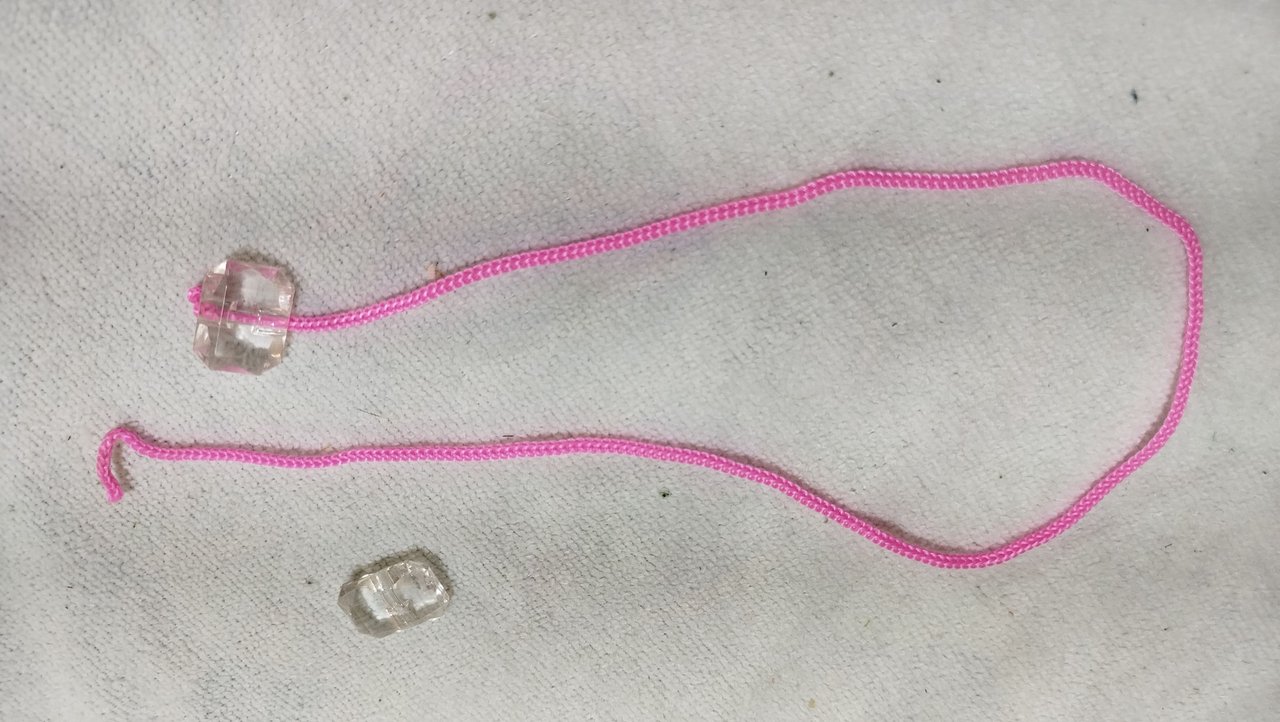
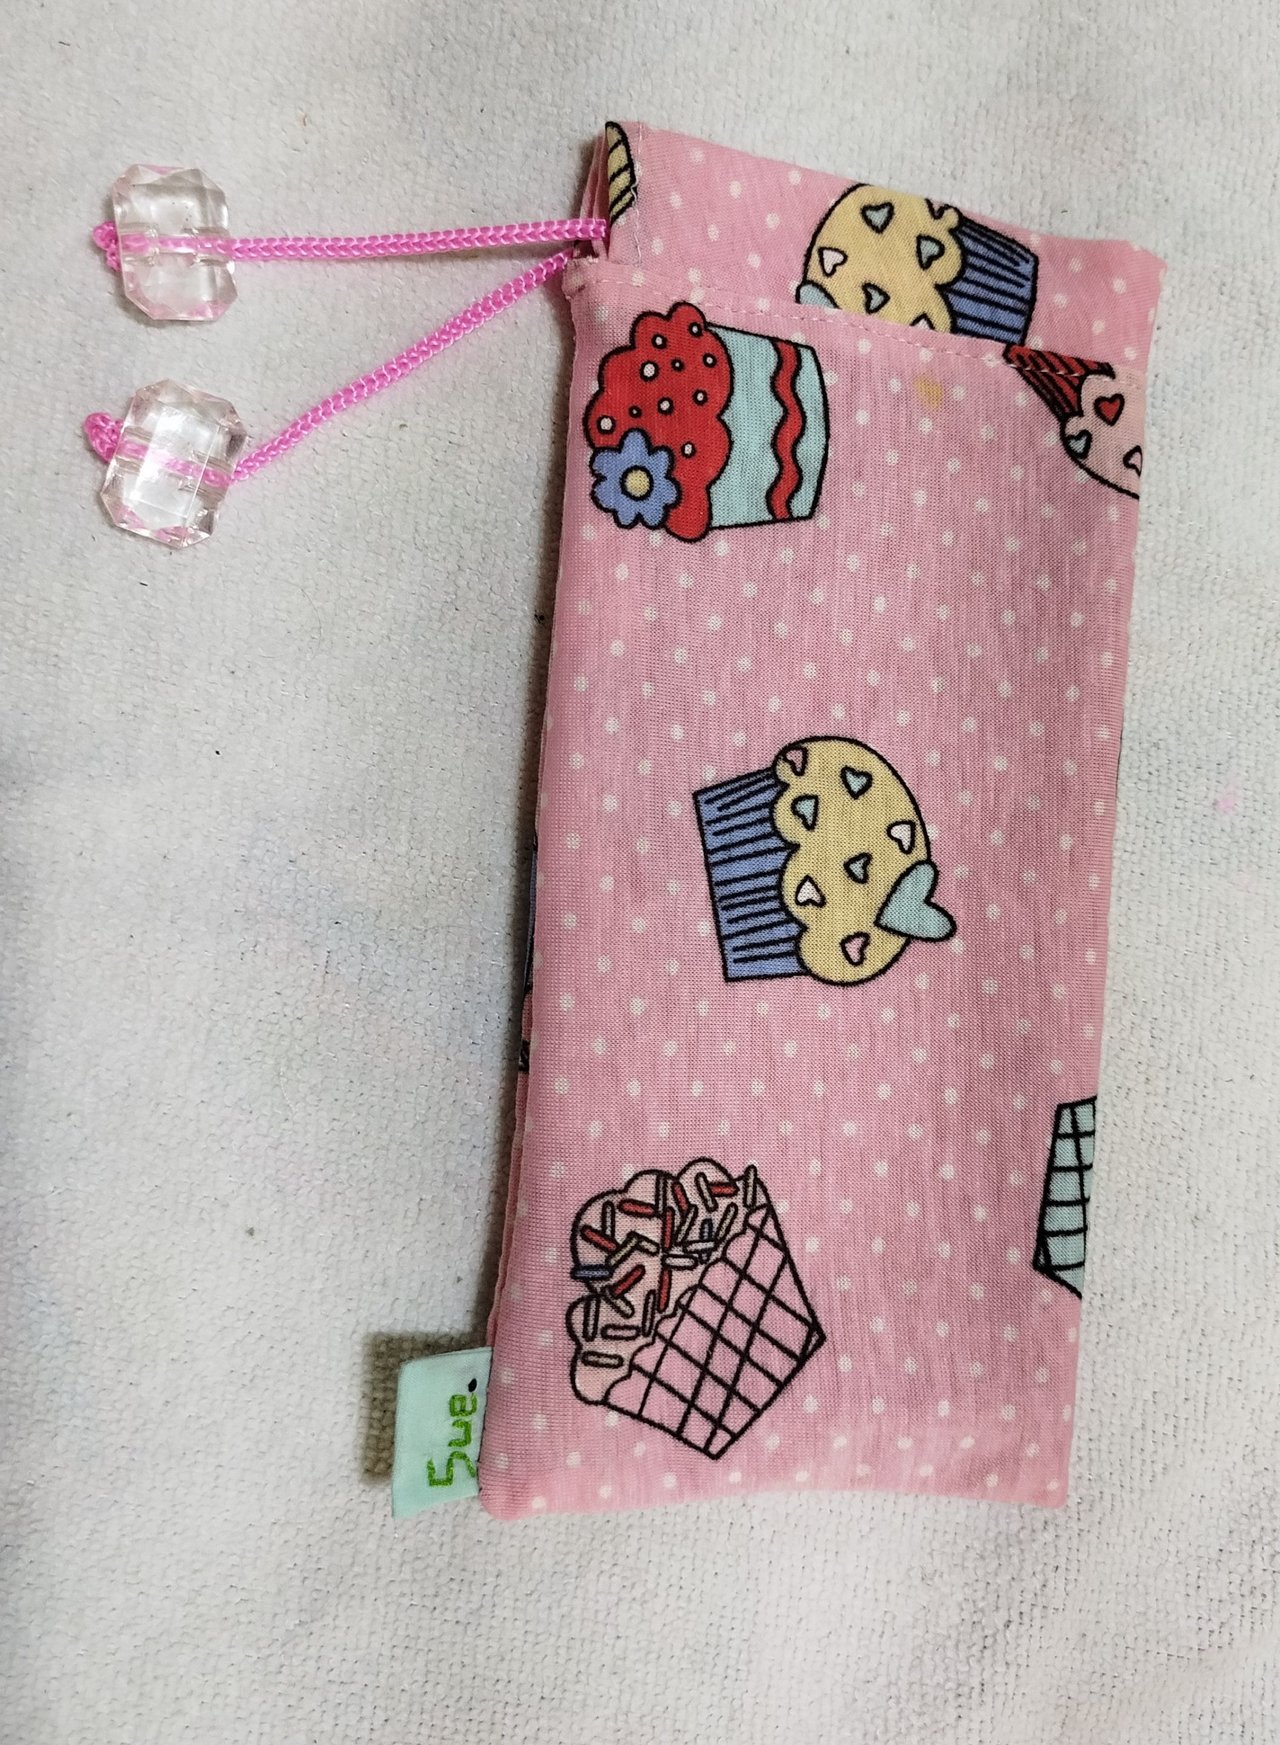
You'll need to cut a rectangle that covers the height of the phone plus the seam allowance, which will serve as the front and back. You'll also need lining fabric, the same size as the other piece (I had a scrap, which I later cut during the process), and an additional strip of fabric where we'll insert the cord that will allow us to close our case. I got the cord from my scraps, but we can come up with something creative since my phone case has a shoelace 😉 For the edges of the cord I used some plastic beads, but we can make a knot big enough so the cord doesn't come out or sew some other detail on the ends... You know how it is: The limit is your imagination 🌈
 |  |
|---|
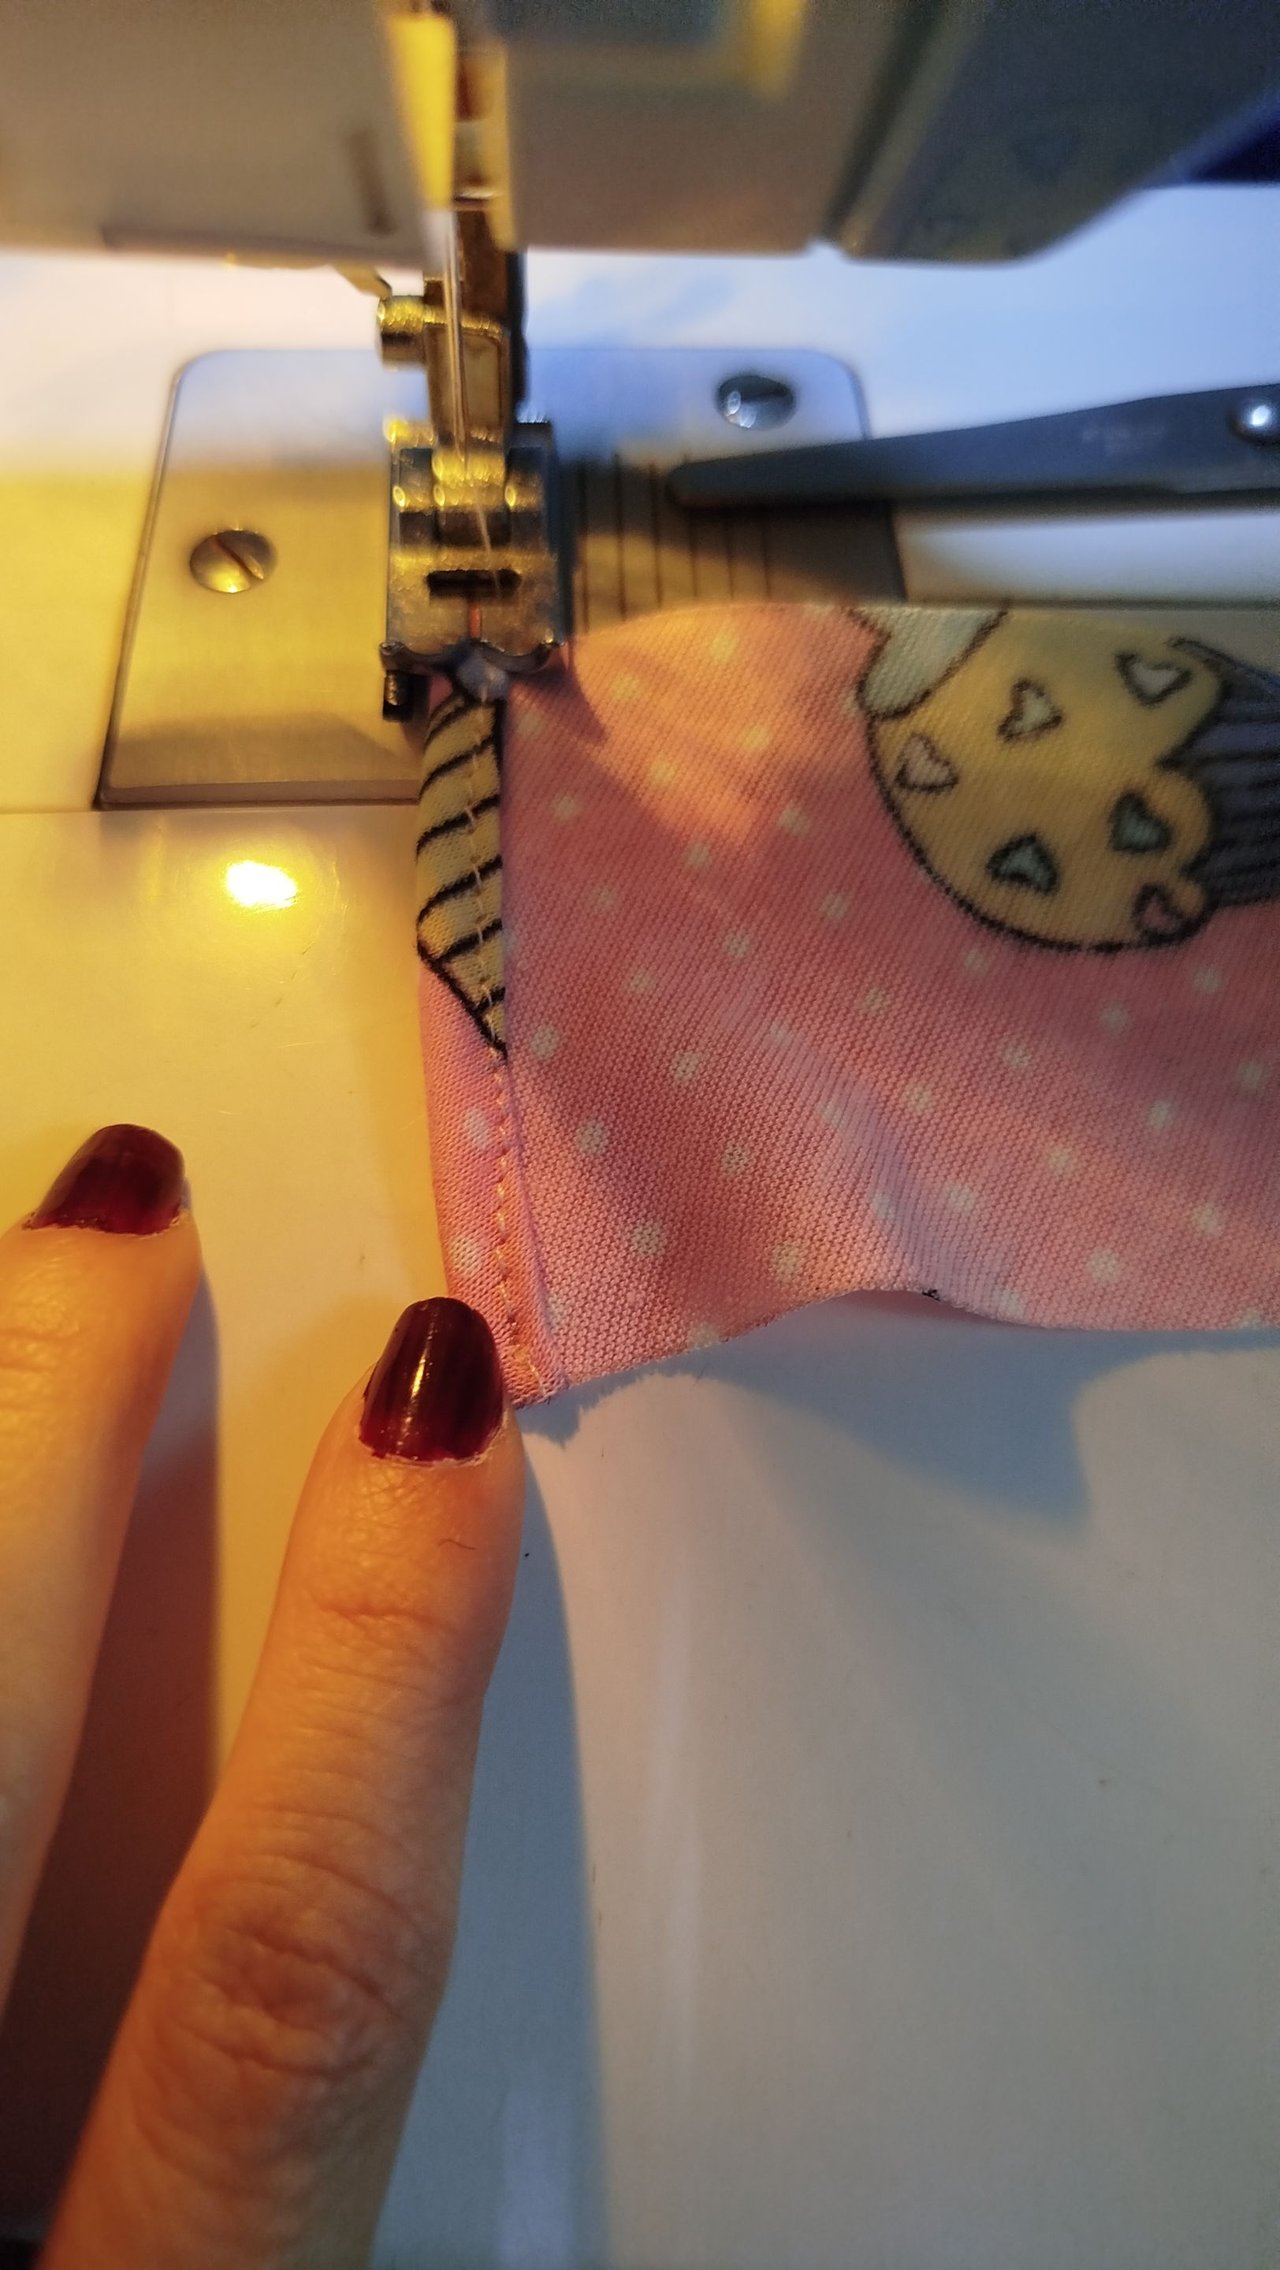
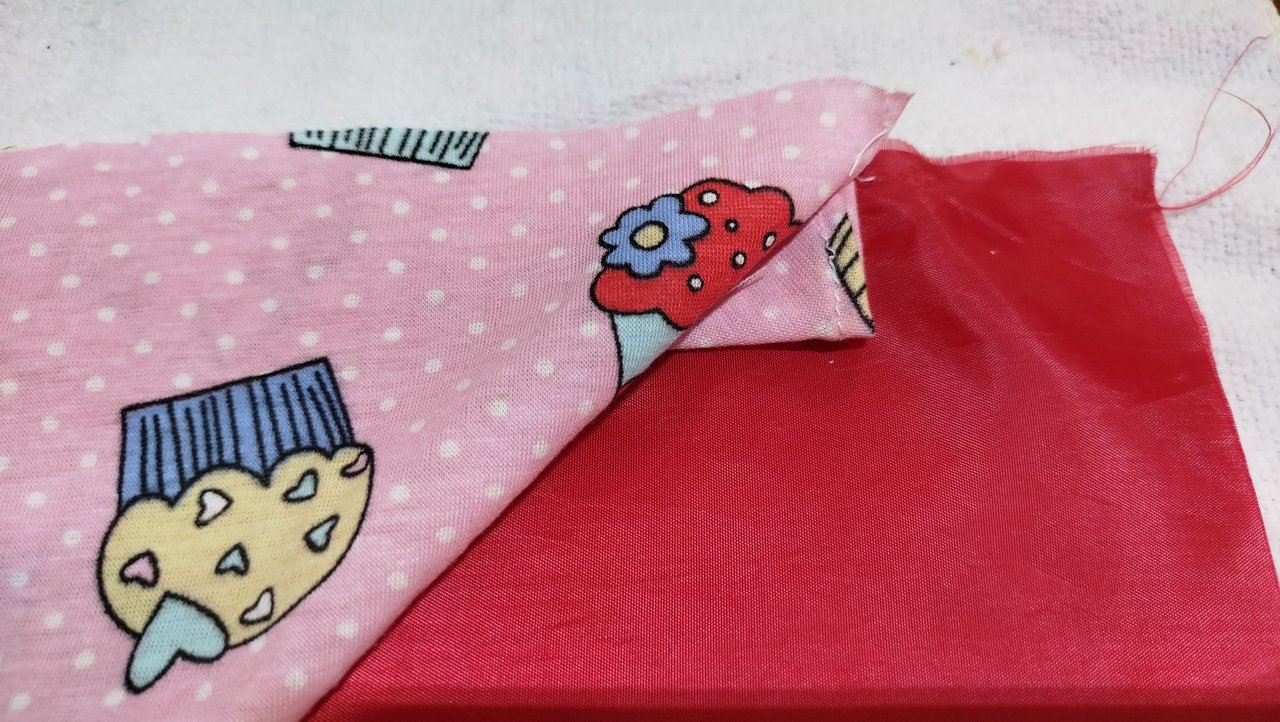
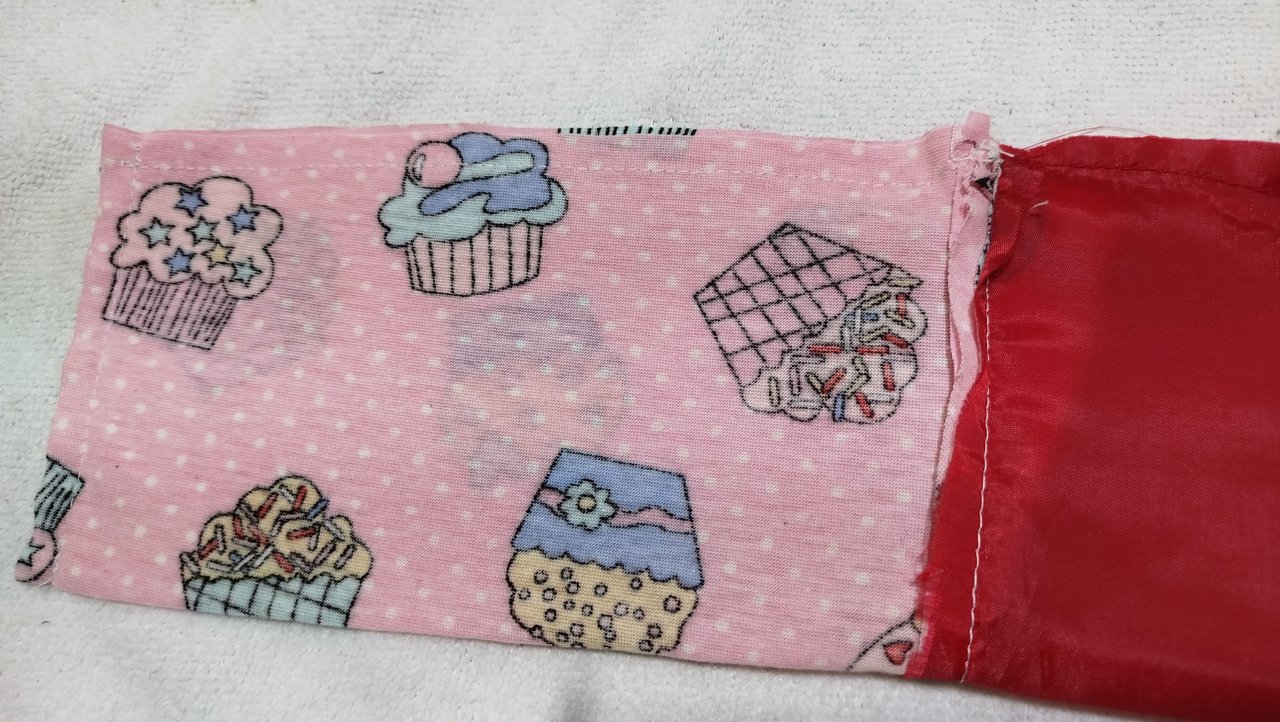
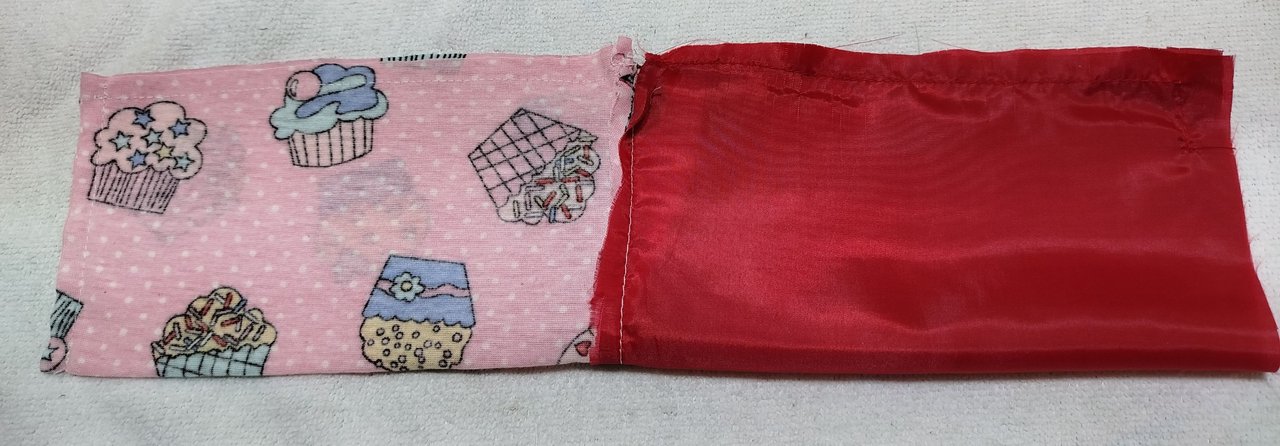
The first thing I did was sew the edges of the strip where the cord would run. This piece would then be folded over, and the cord would go inside it. The entire piece is about 6 cm long, so when folded, it would be about 3 cm high.
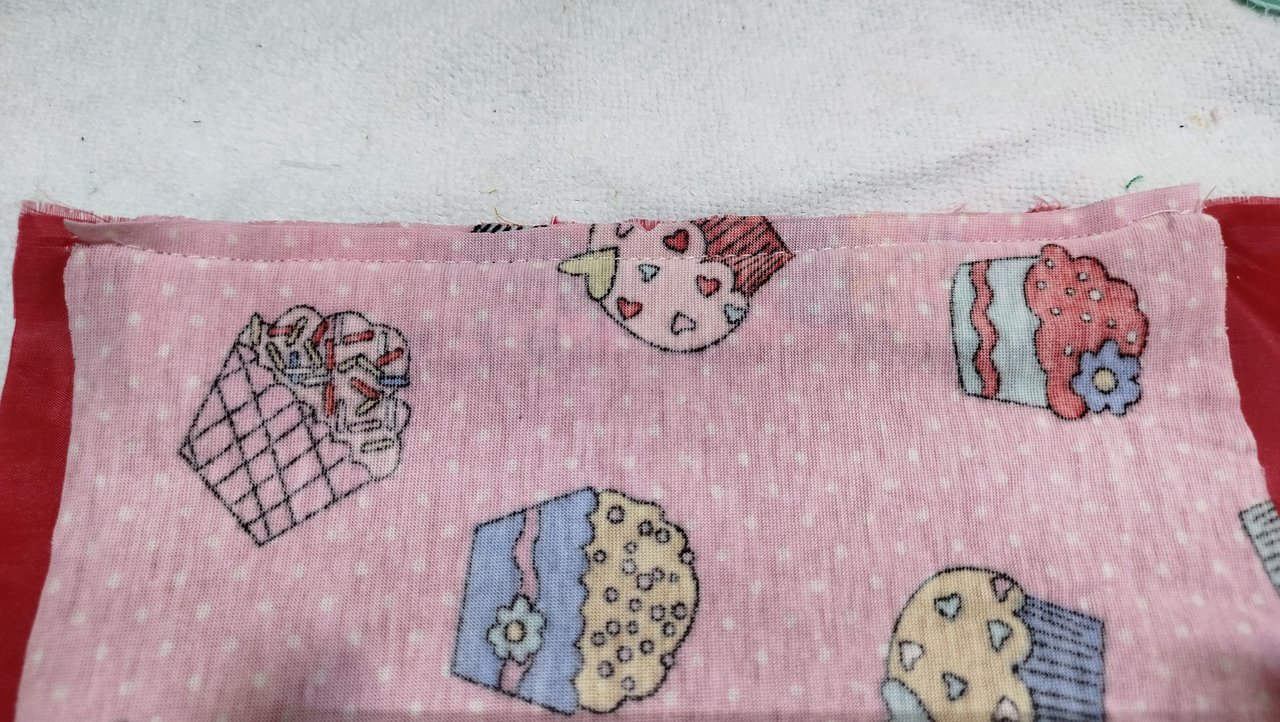
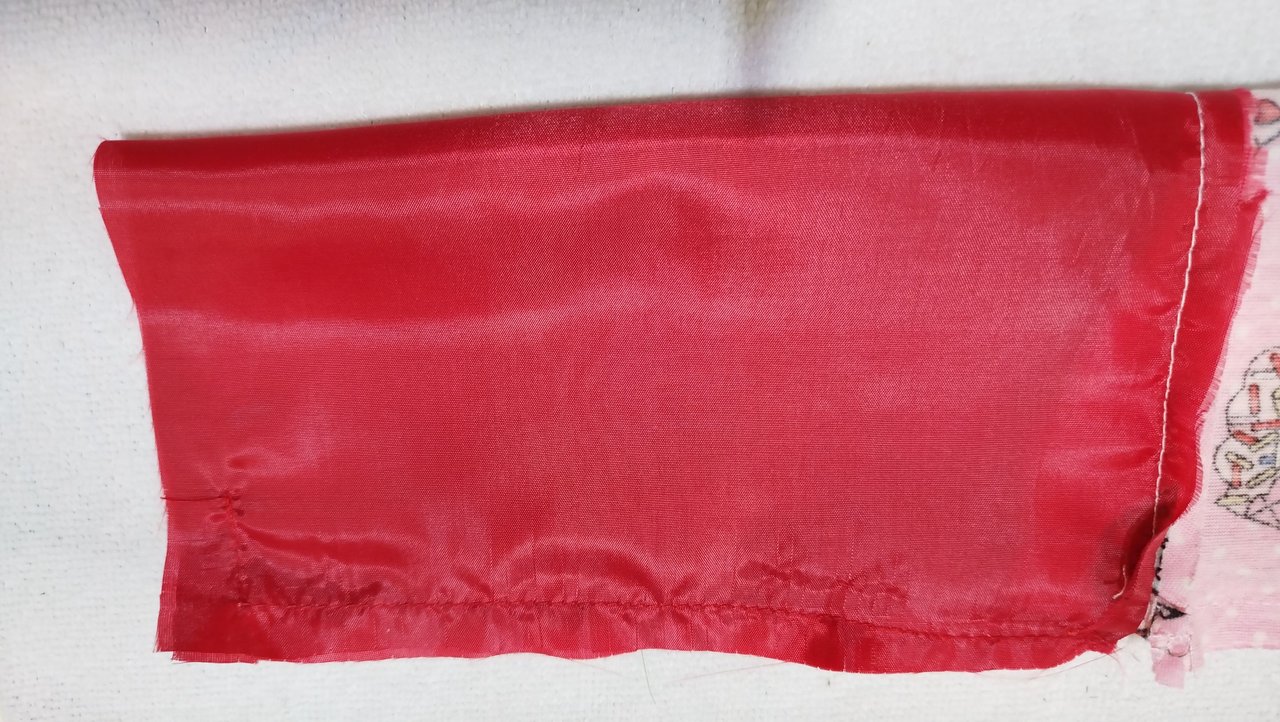
Then, I folded this piece and placed it between the main fabric and the lining, sewing it with a straight seam. It looks like the photos show.
 |  |
|---|
 |  |  |
|---|
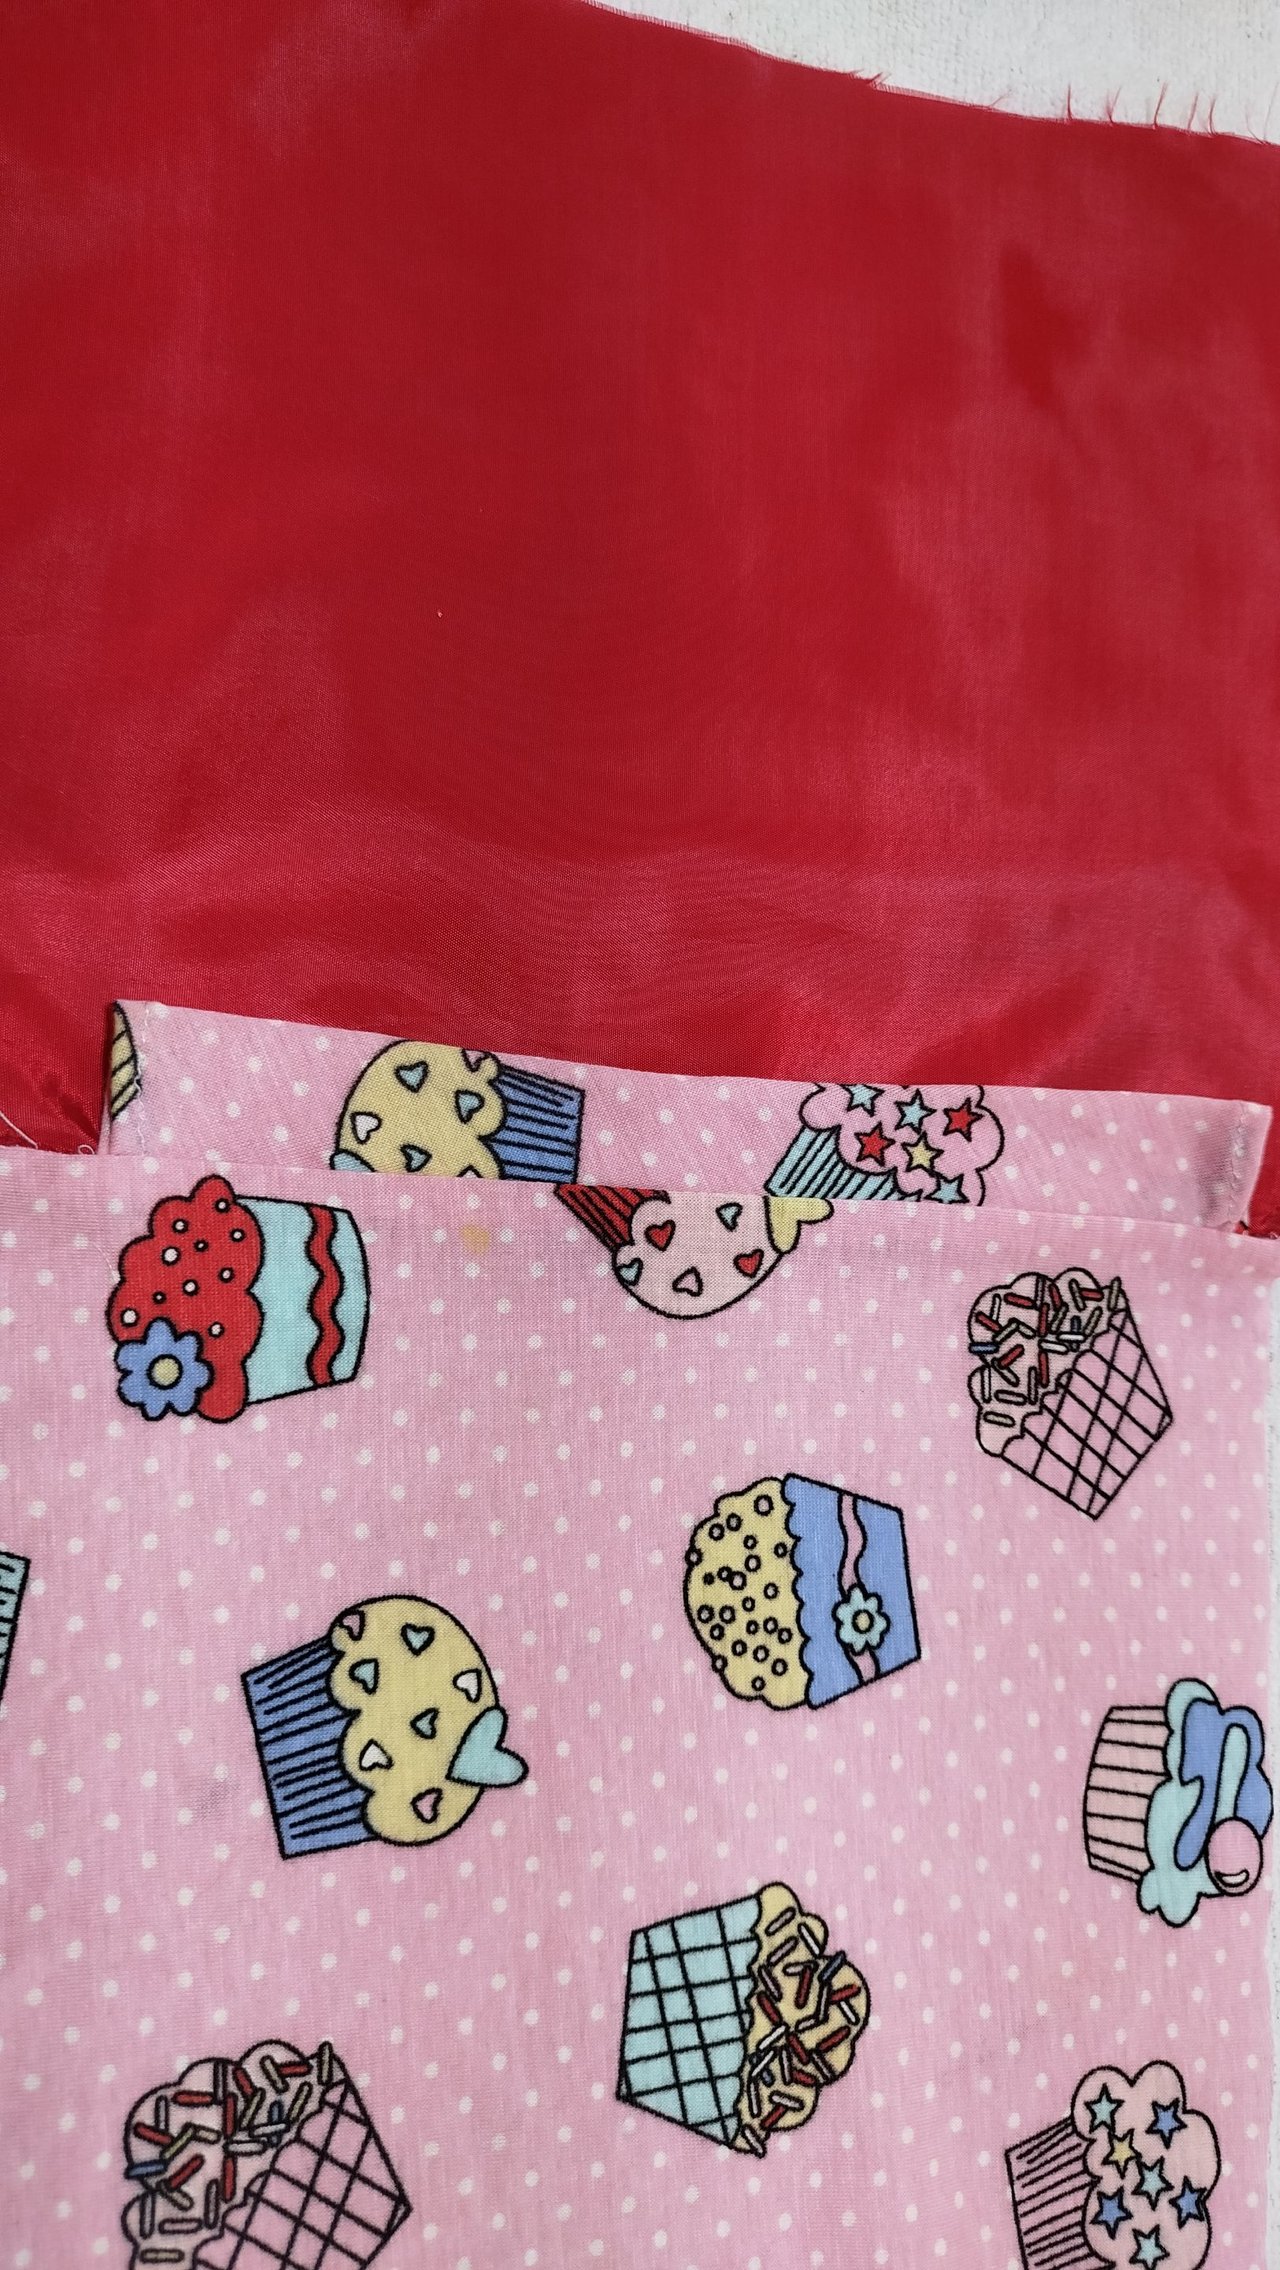
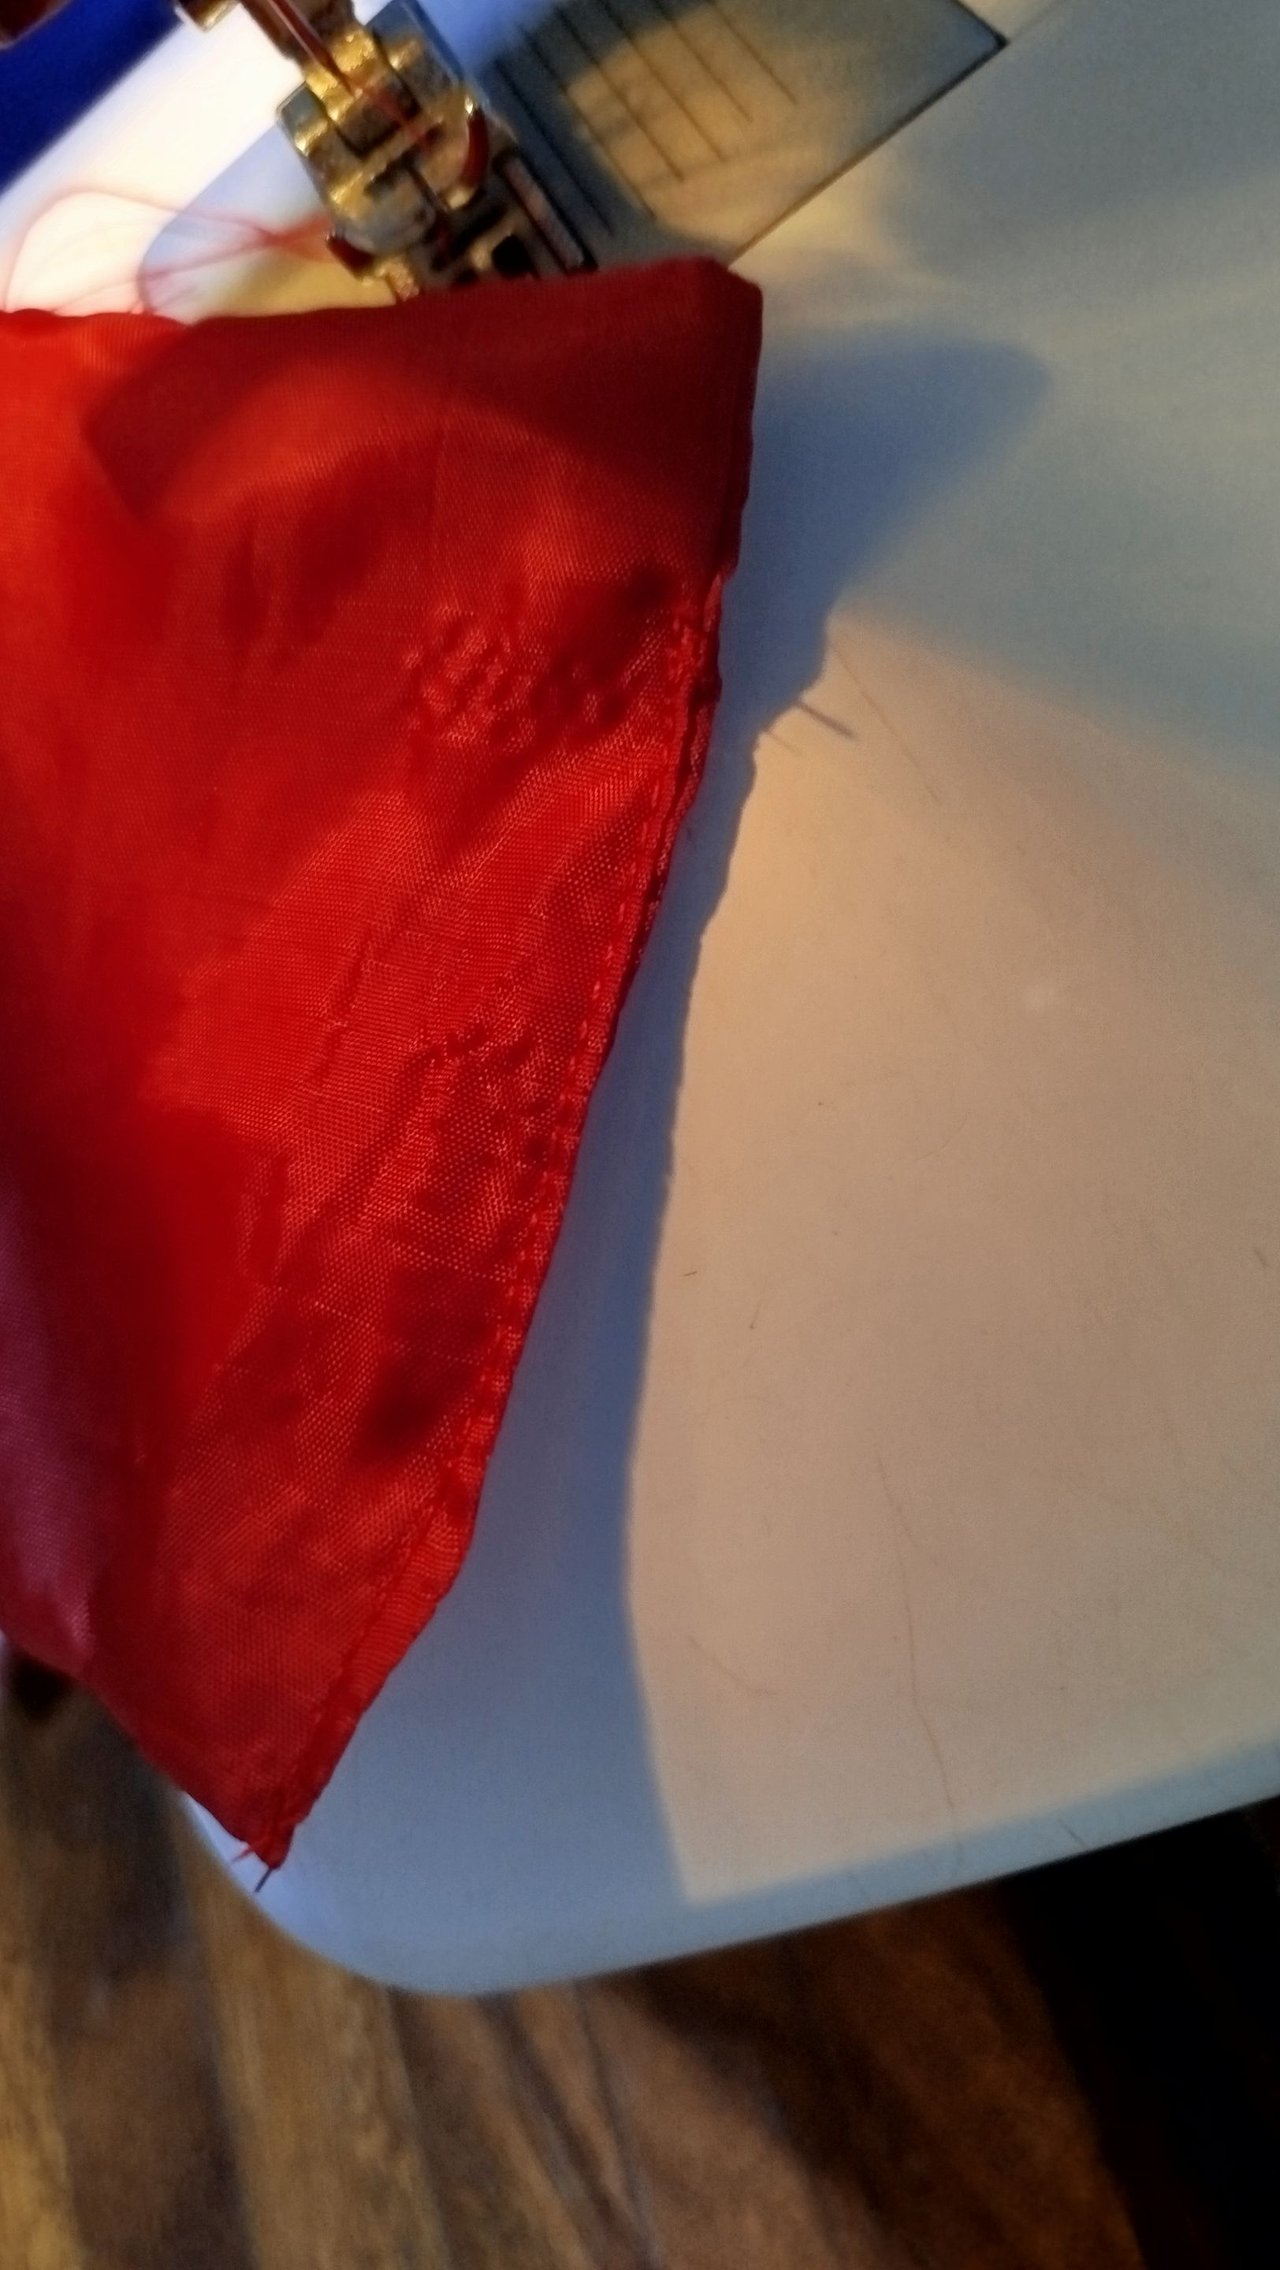
Next, I faced the right sides together and proceeded to sew a straight seam around the entire edge of the pieces, leaving a small opening in the lining part, so I could turn the work inside out (at this point, I took the opportunity to place a small label, like my personal stamp 😉).
 |  |  |
|---|
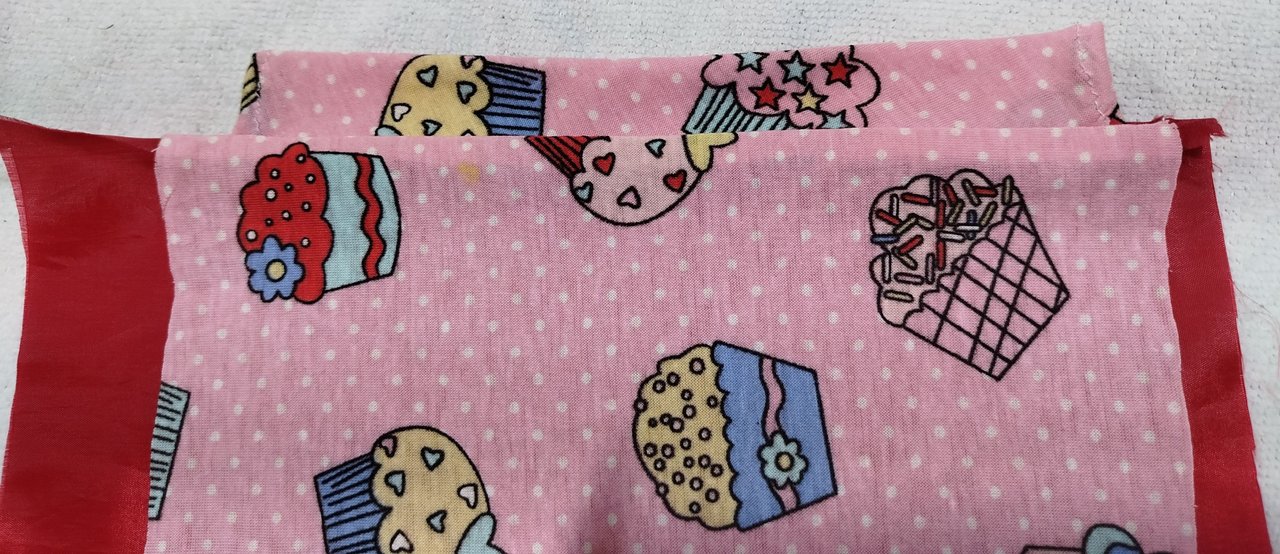
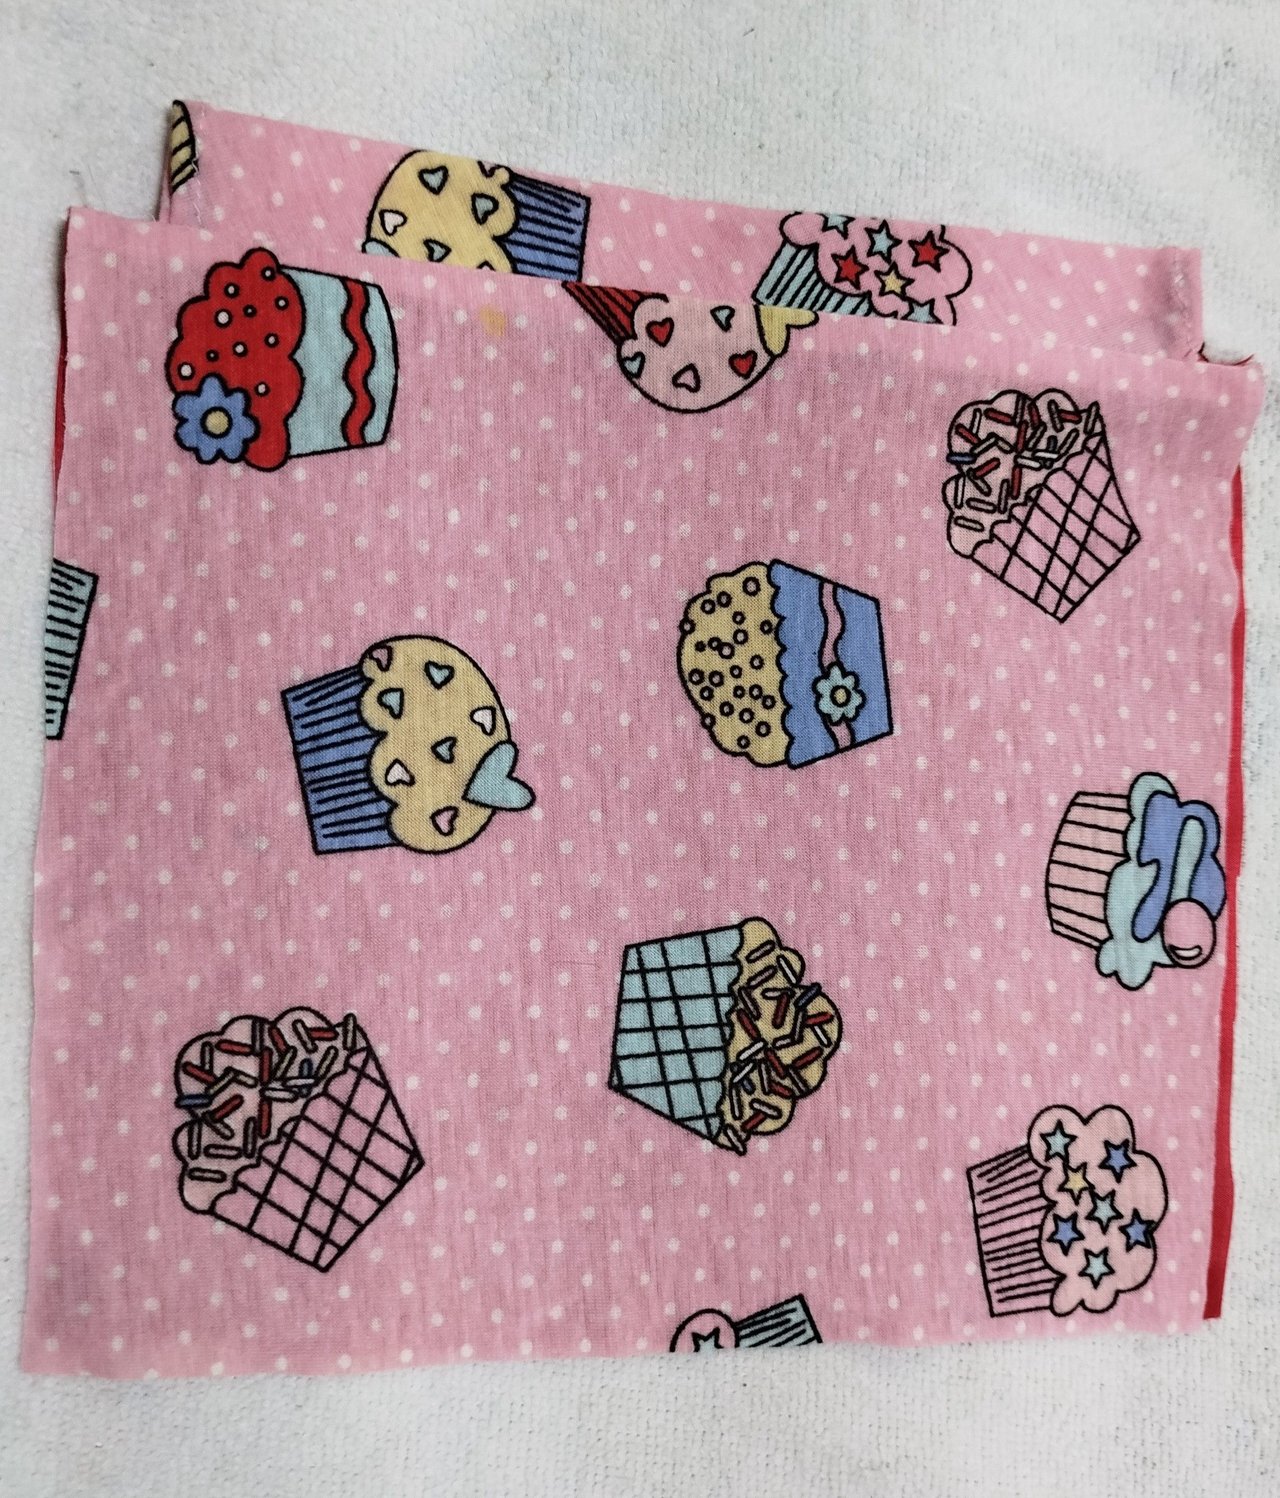
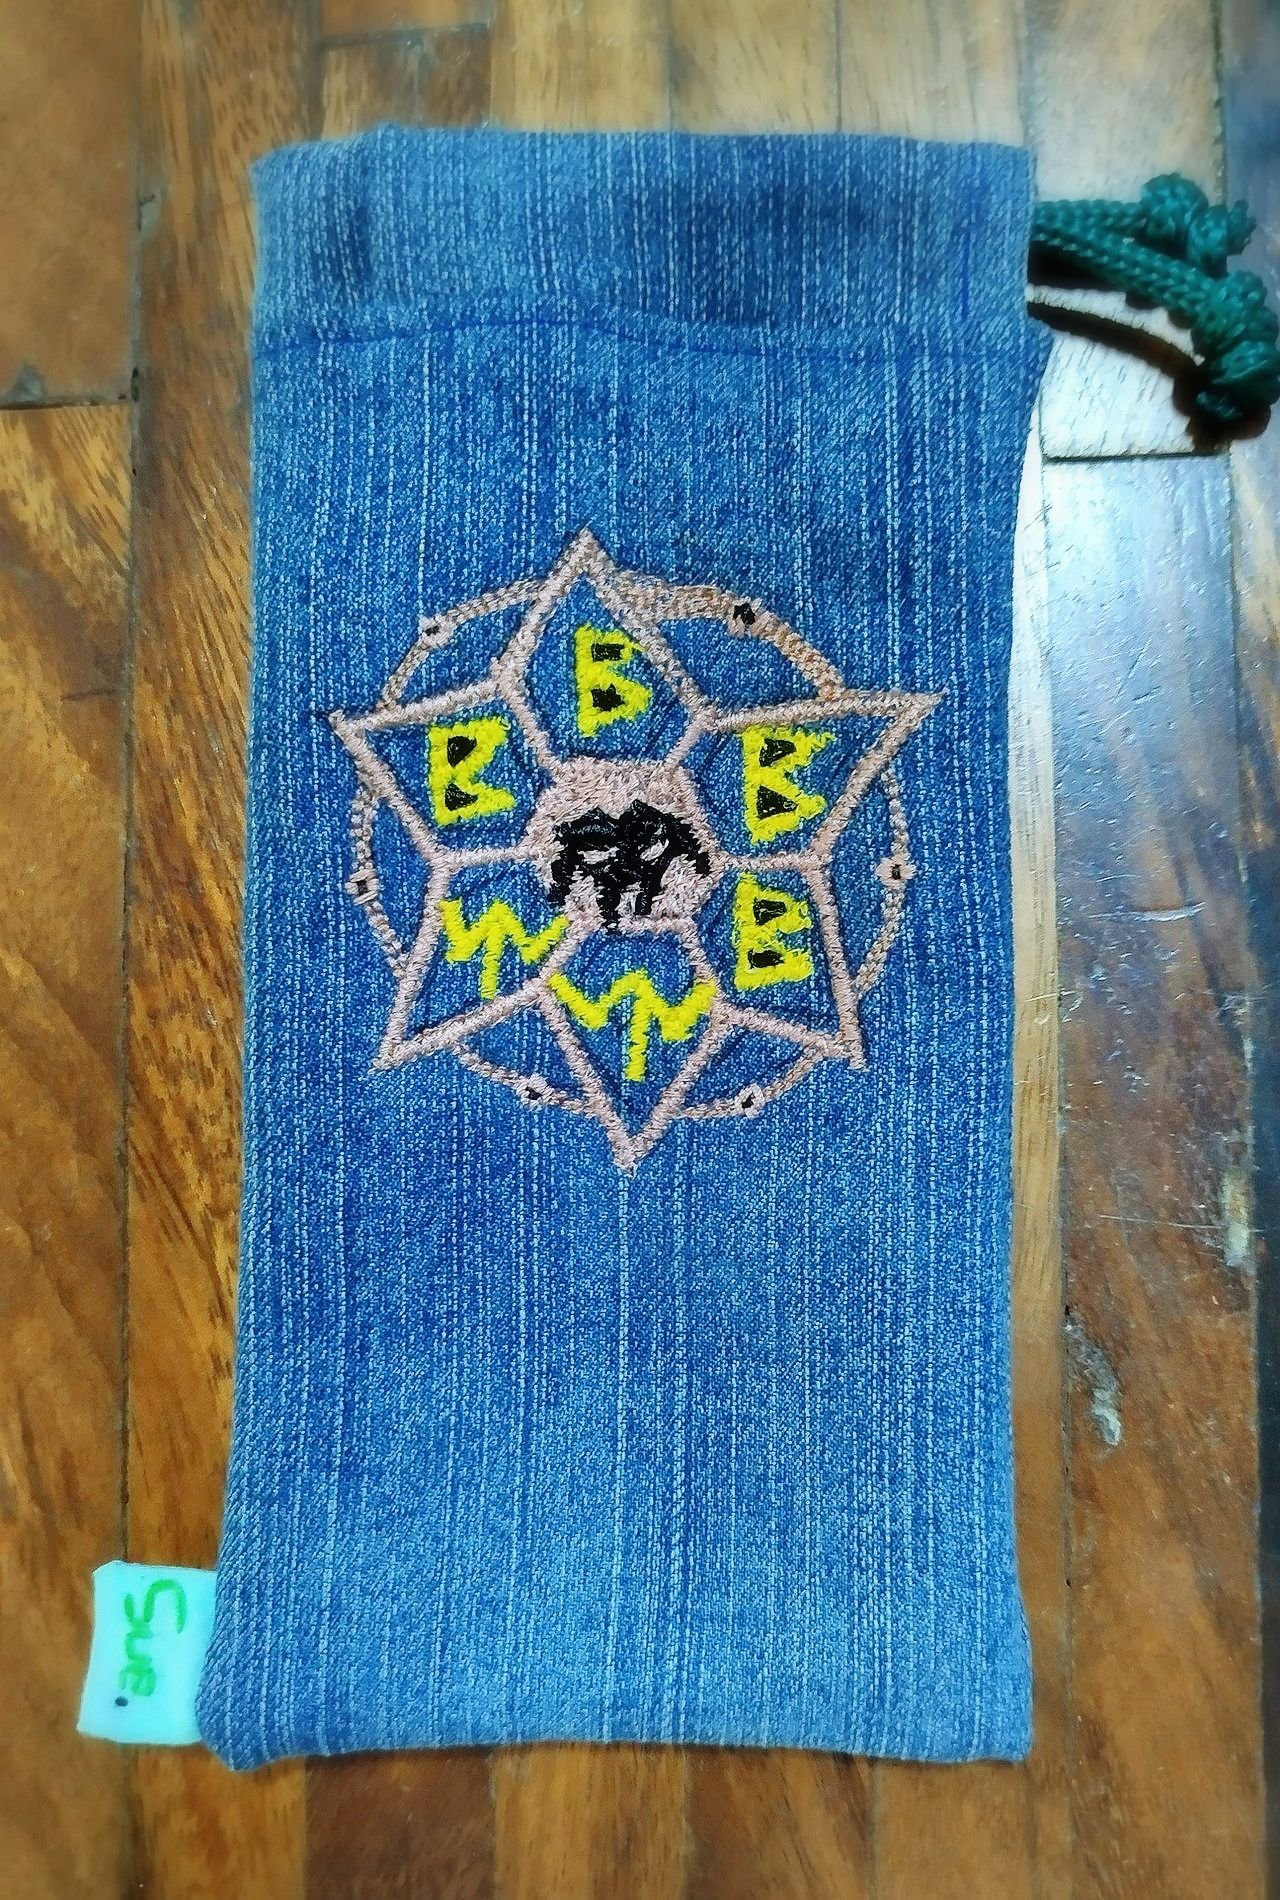
Once I turned the piece right side out, I closed the opening with a straight seam and inserted the lining inside the pillowcase. Once I added the drawstring, the pillowcase was ready ✨
 |  |  |
|---|
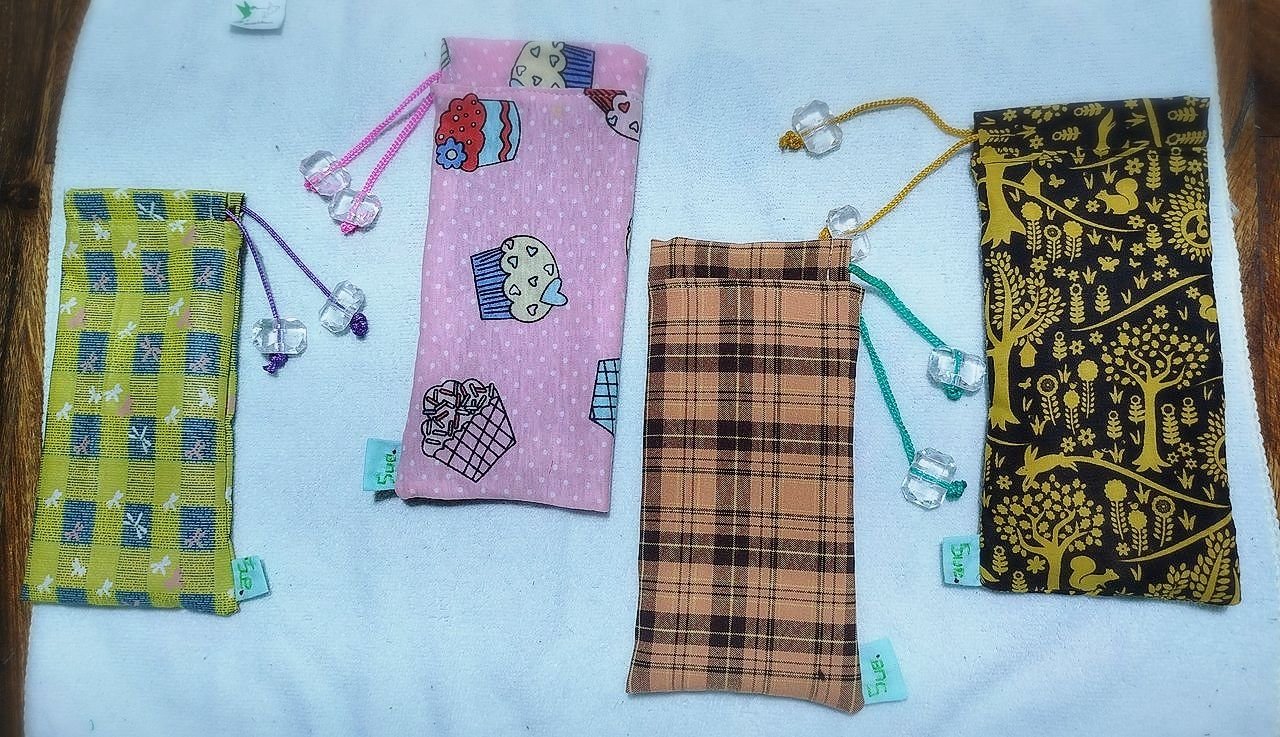
As you can see, this is an extremely easy and inexpensive project. I even think it can be done by hand sewing, without much difficulty (if you don't have a sewing machine). With printed fabric, you can create some pretty cute designs, and you can make them for personal use, as a gift, or to sell.
In my case, I gave one to my mother, my grandmother, and some friends. My mother was delighted because, as I mentioned, she used to wrap her phone in a hat or a scarf. You have no idea how happy it makes me every time she comes to visit and when she takes her phone out of her purse, it's always in its case 😊 On the other hand, my grandmother doesn't usually leave her apartment much, but when I mentioned that I used to put my phone in my case before putting it in the drawer where I usually keep it at night, she exclaimed, "Perfect!" 😌

🌈 An extra decorating idea 🎨
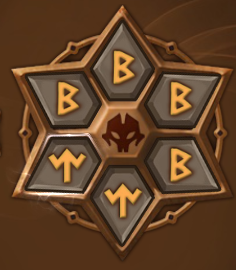
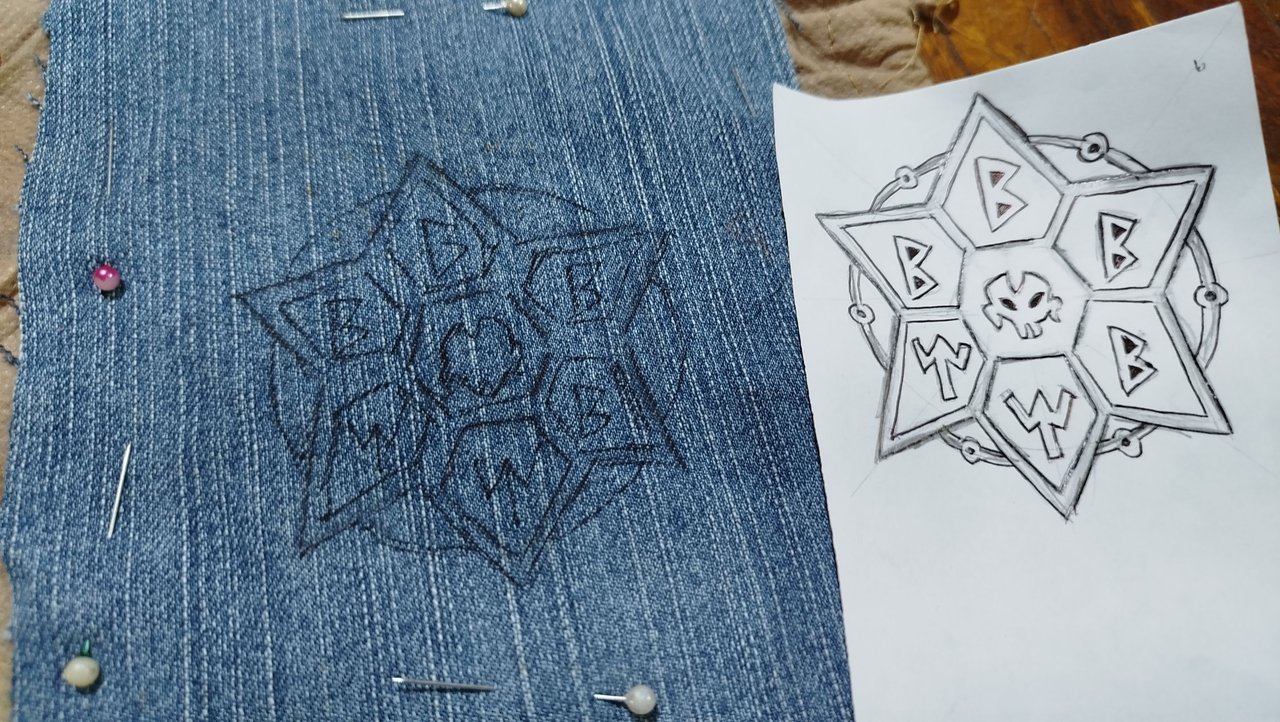
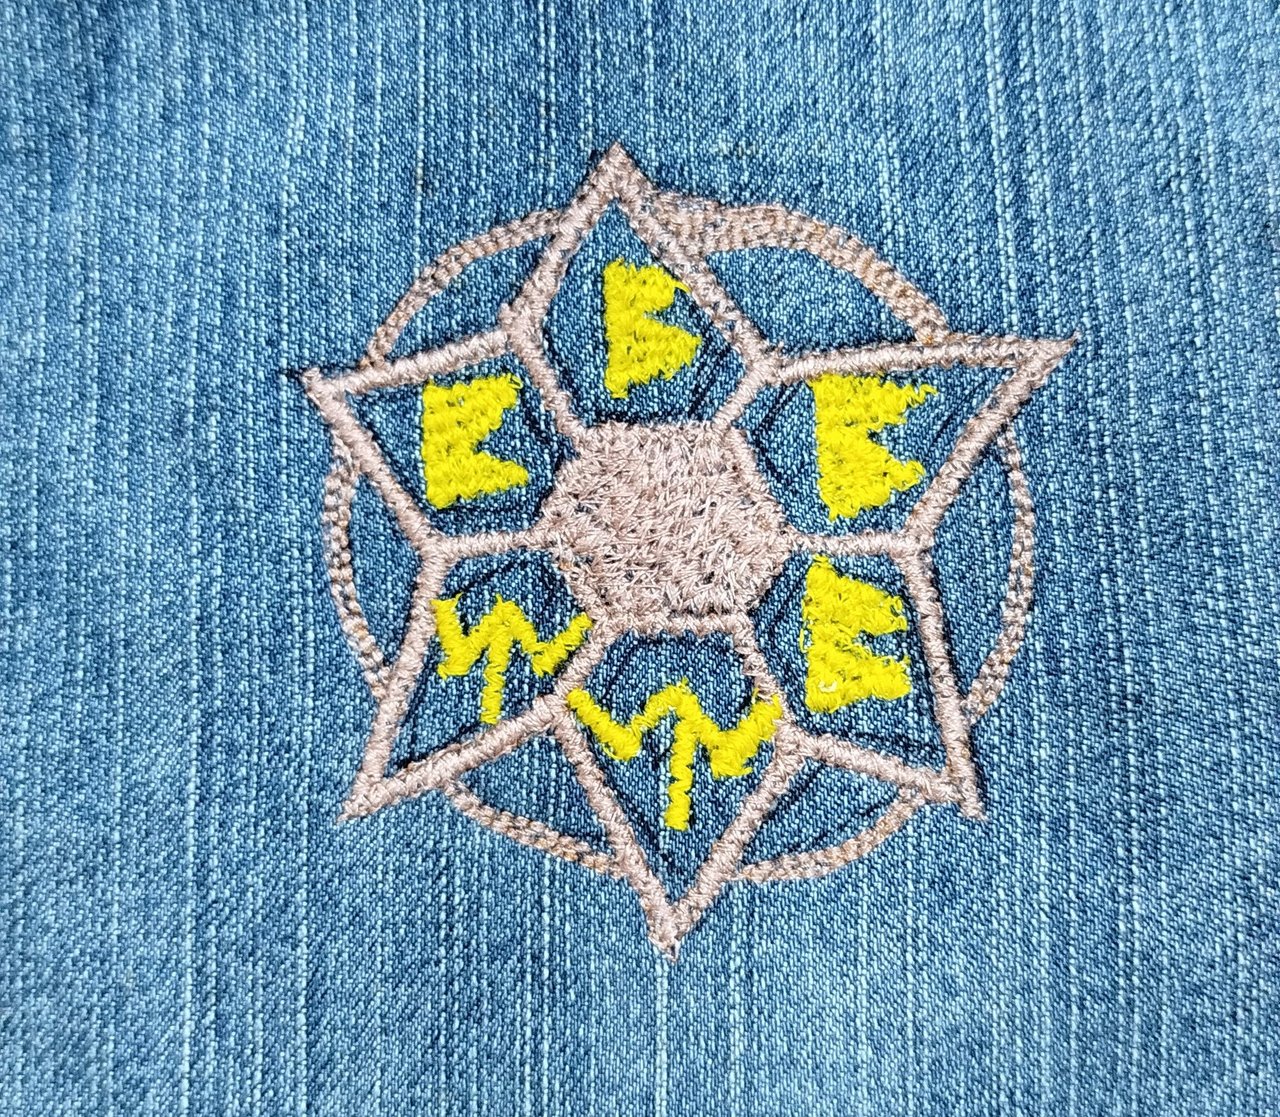
If we want to make a more special pillowcase, we can do something like hand-embroidering the person's name or initials on the fabric before making the pillowcase, do the same but with a drawing, painted with fabric paint, or like the idea I'm about to show you, which is embroidering a representative figure with a sewing machine. In this case, the pillowcase was to be given to my boyfriend, who's a Summoners War player. He wanted me to make him a figure of a summoning rune from the game... or something like that 😅
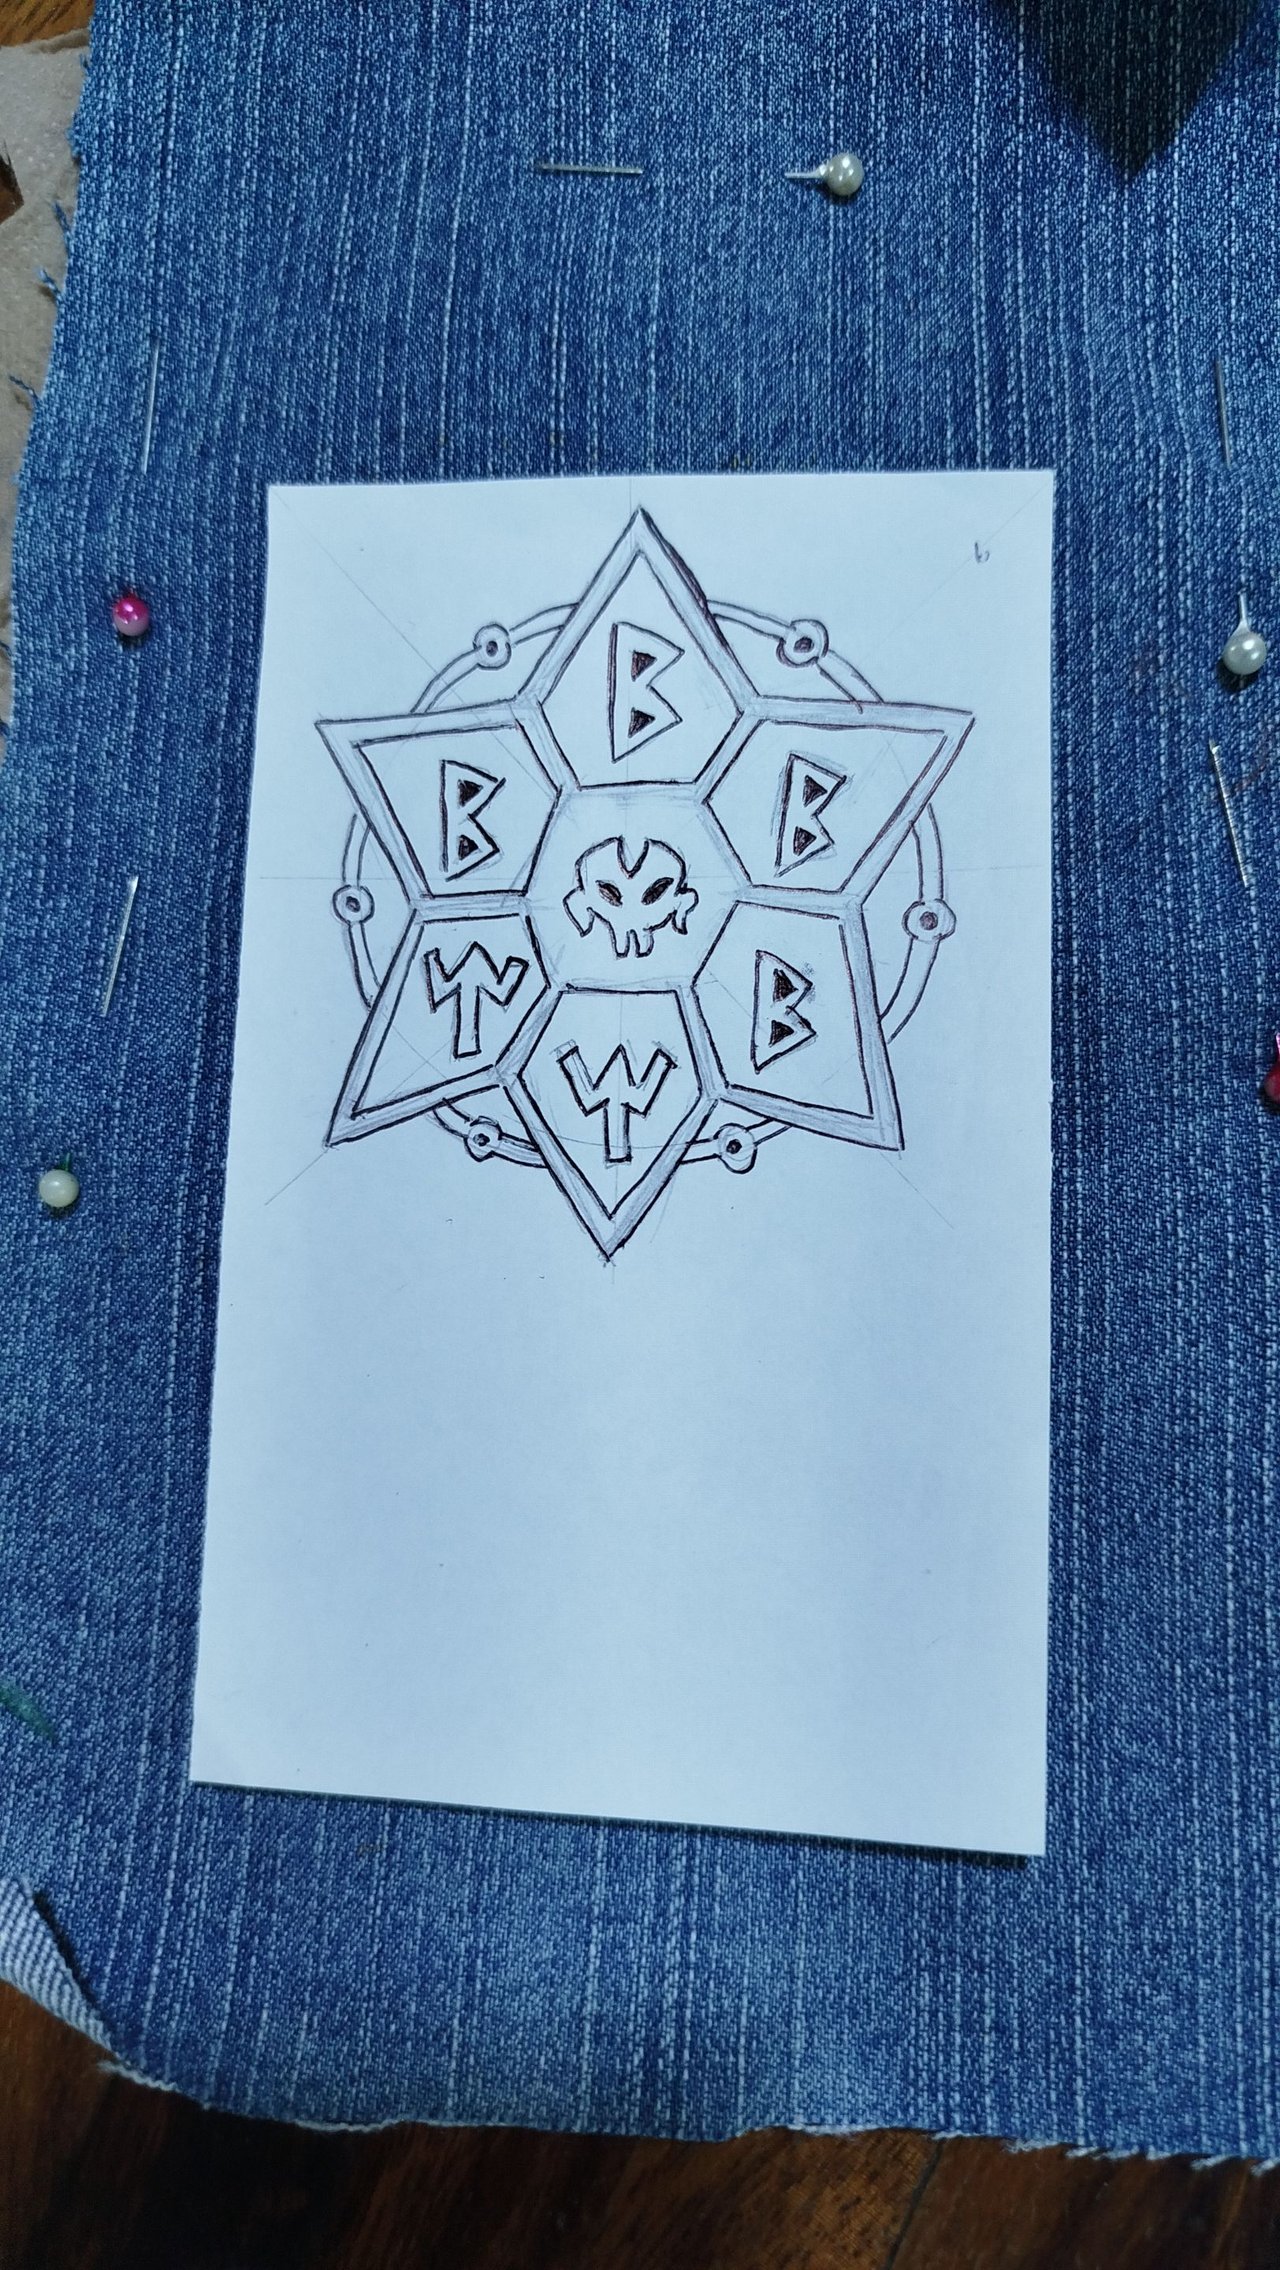
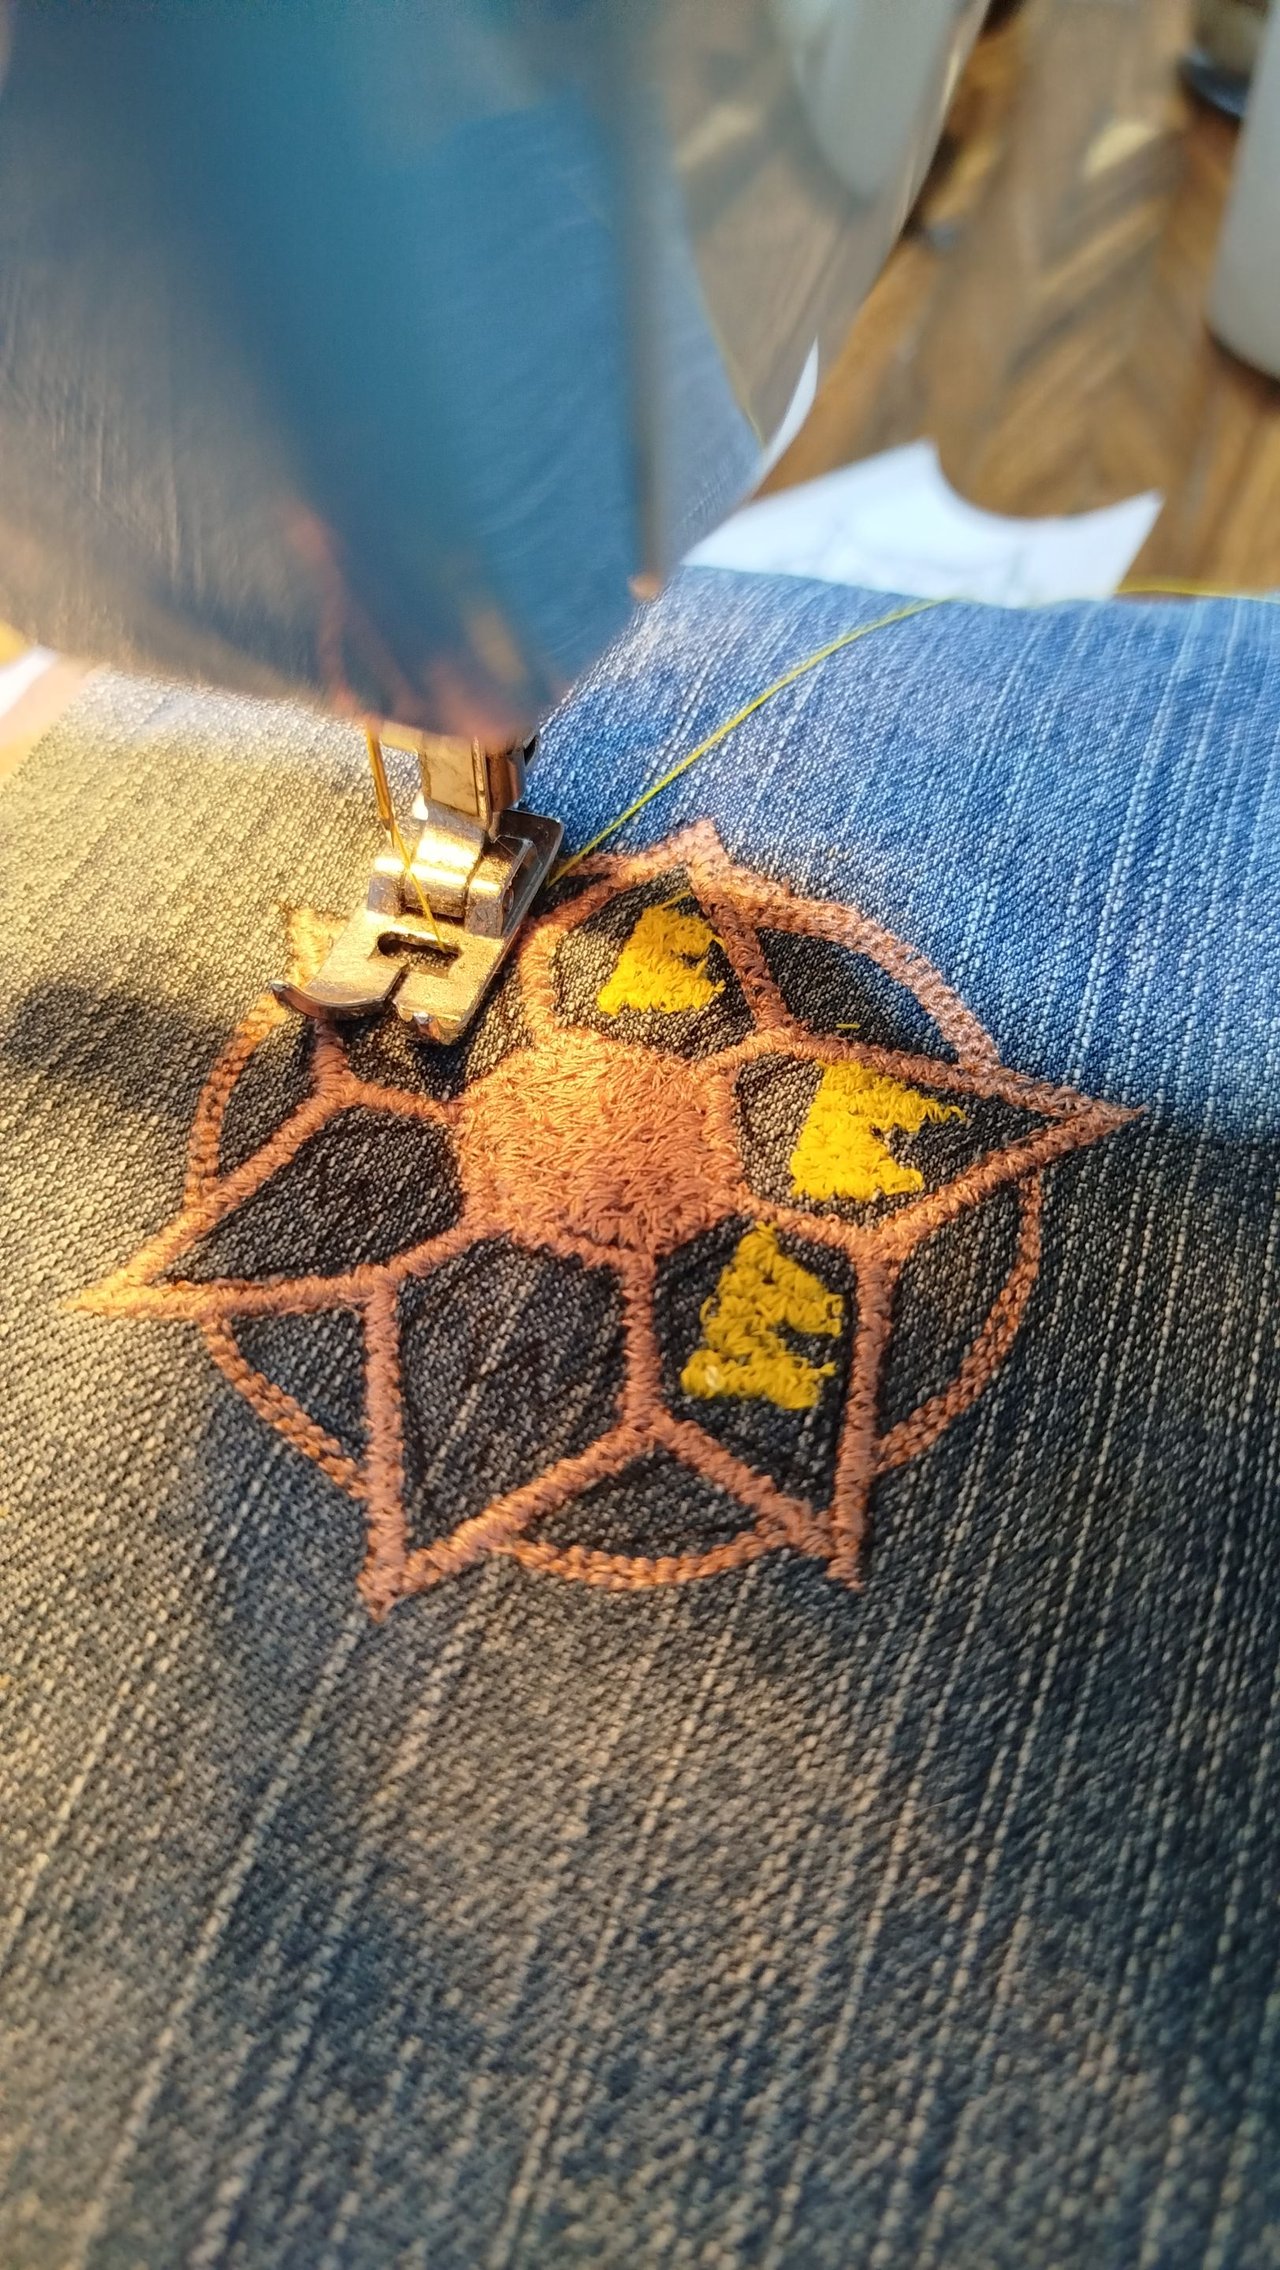
I could have done the drawing with fabric paint, and I think it would have been much easier, but since I didn't have that material, I decided to risk using my sewing machine. I'd done embroidery before, so I wanted to try it again. Last time, however, I had removed the foot and lowered the sewing machine's teeth, as the instruction manual indicated when doing embroidery. But this time, I wanted to try embroidering without doing this because I'd seen a guy on Instagram who was doing embroidery with a homemade machine, without removing the foot or lowering the sewing machine's teeth (like when you sew normally).
 |  |  |
|---|
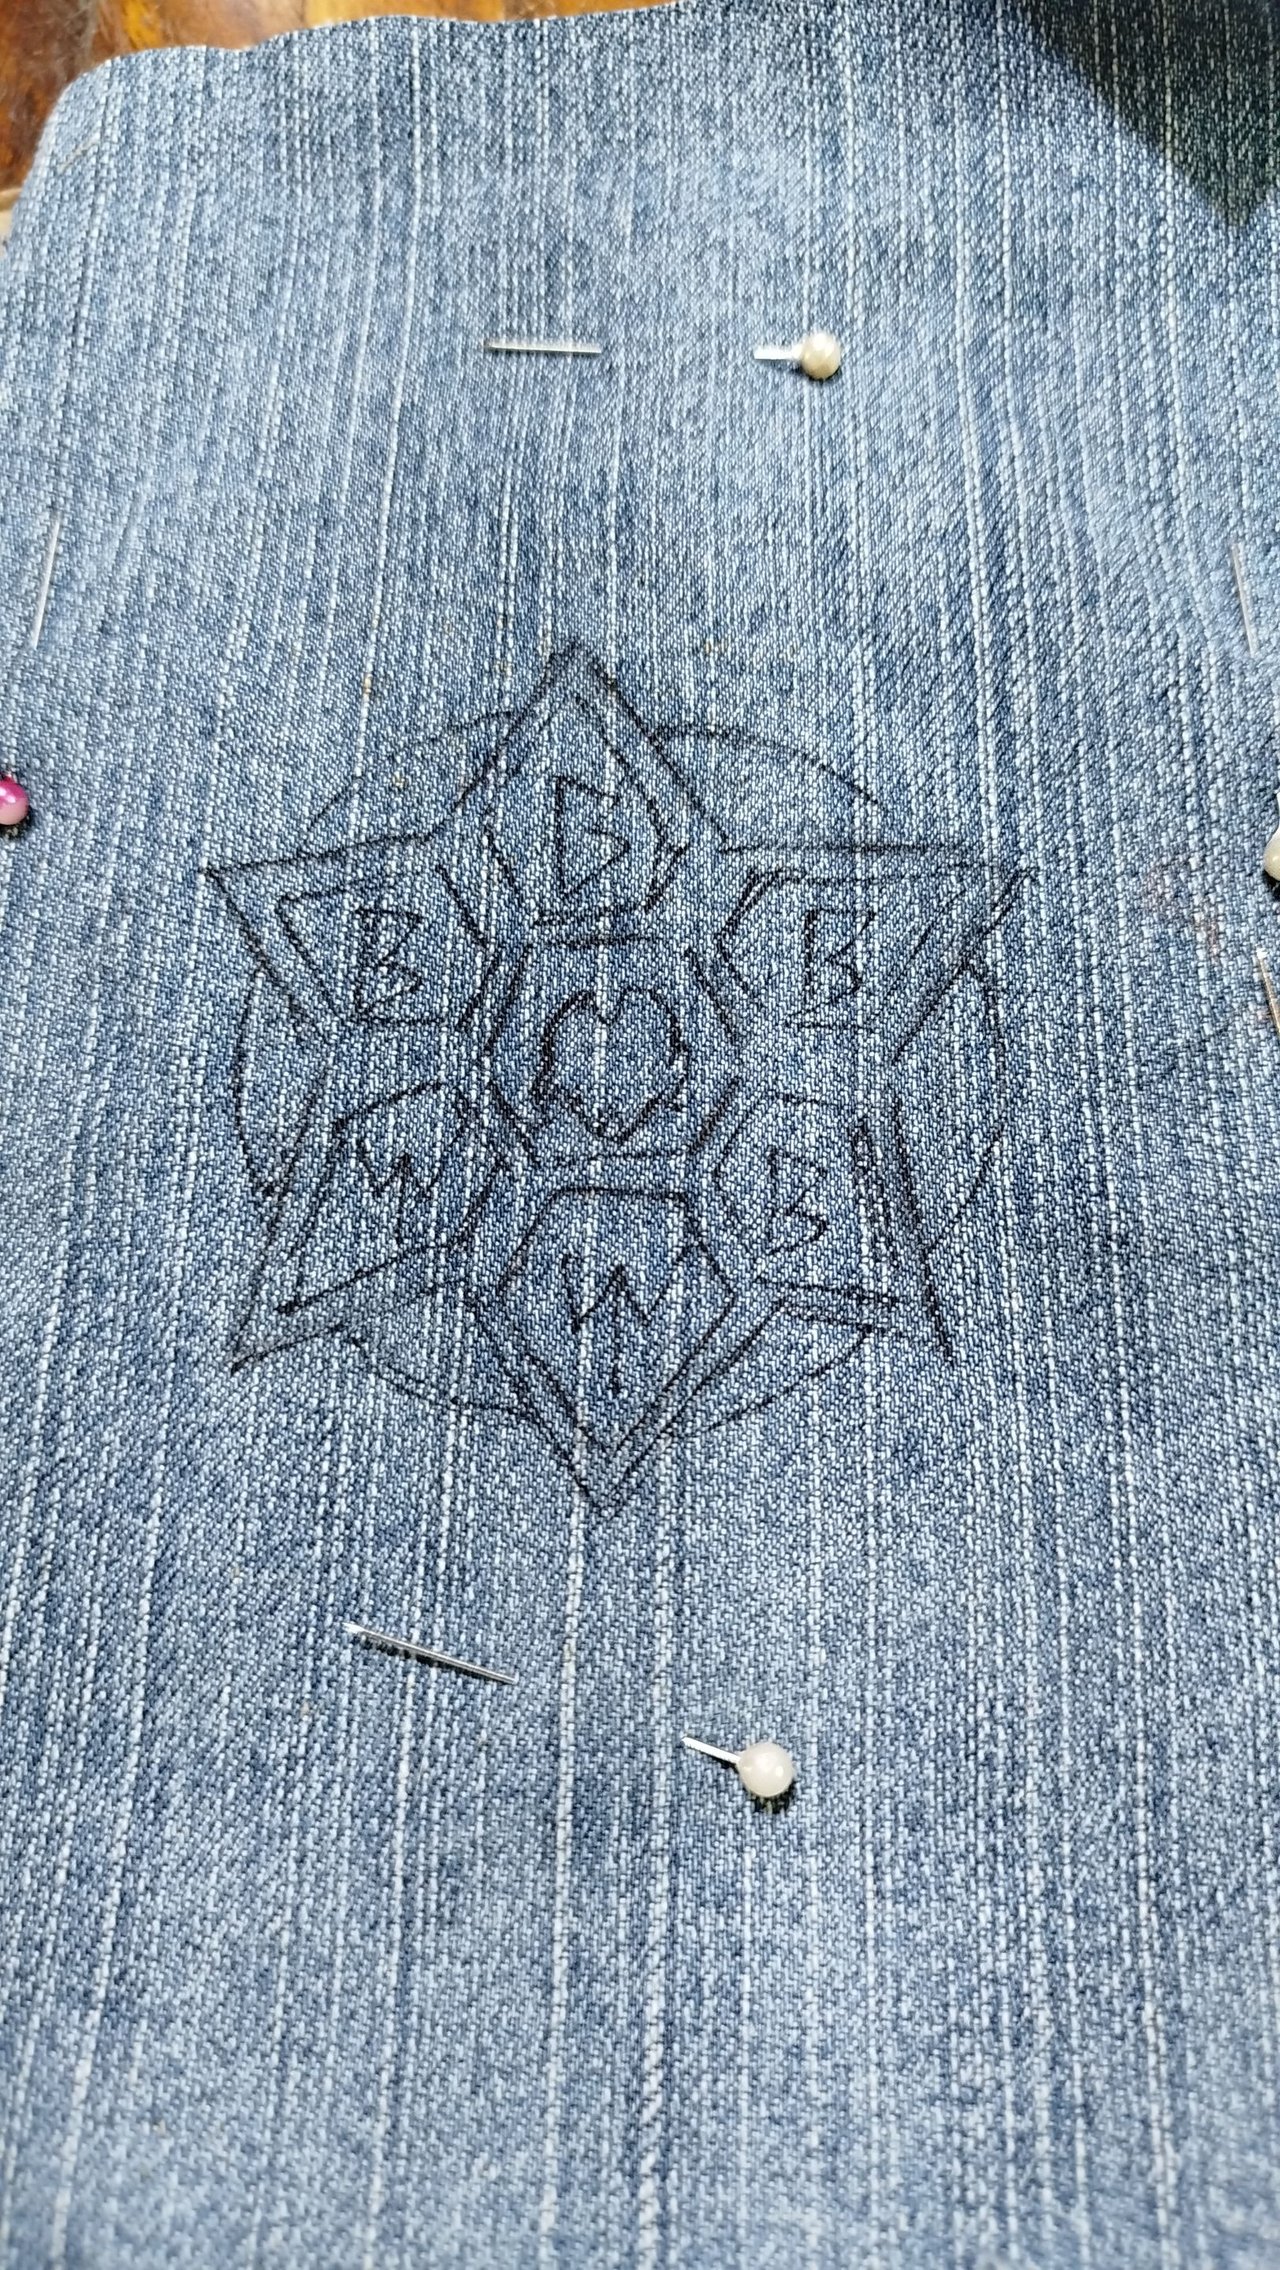
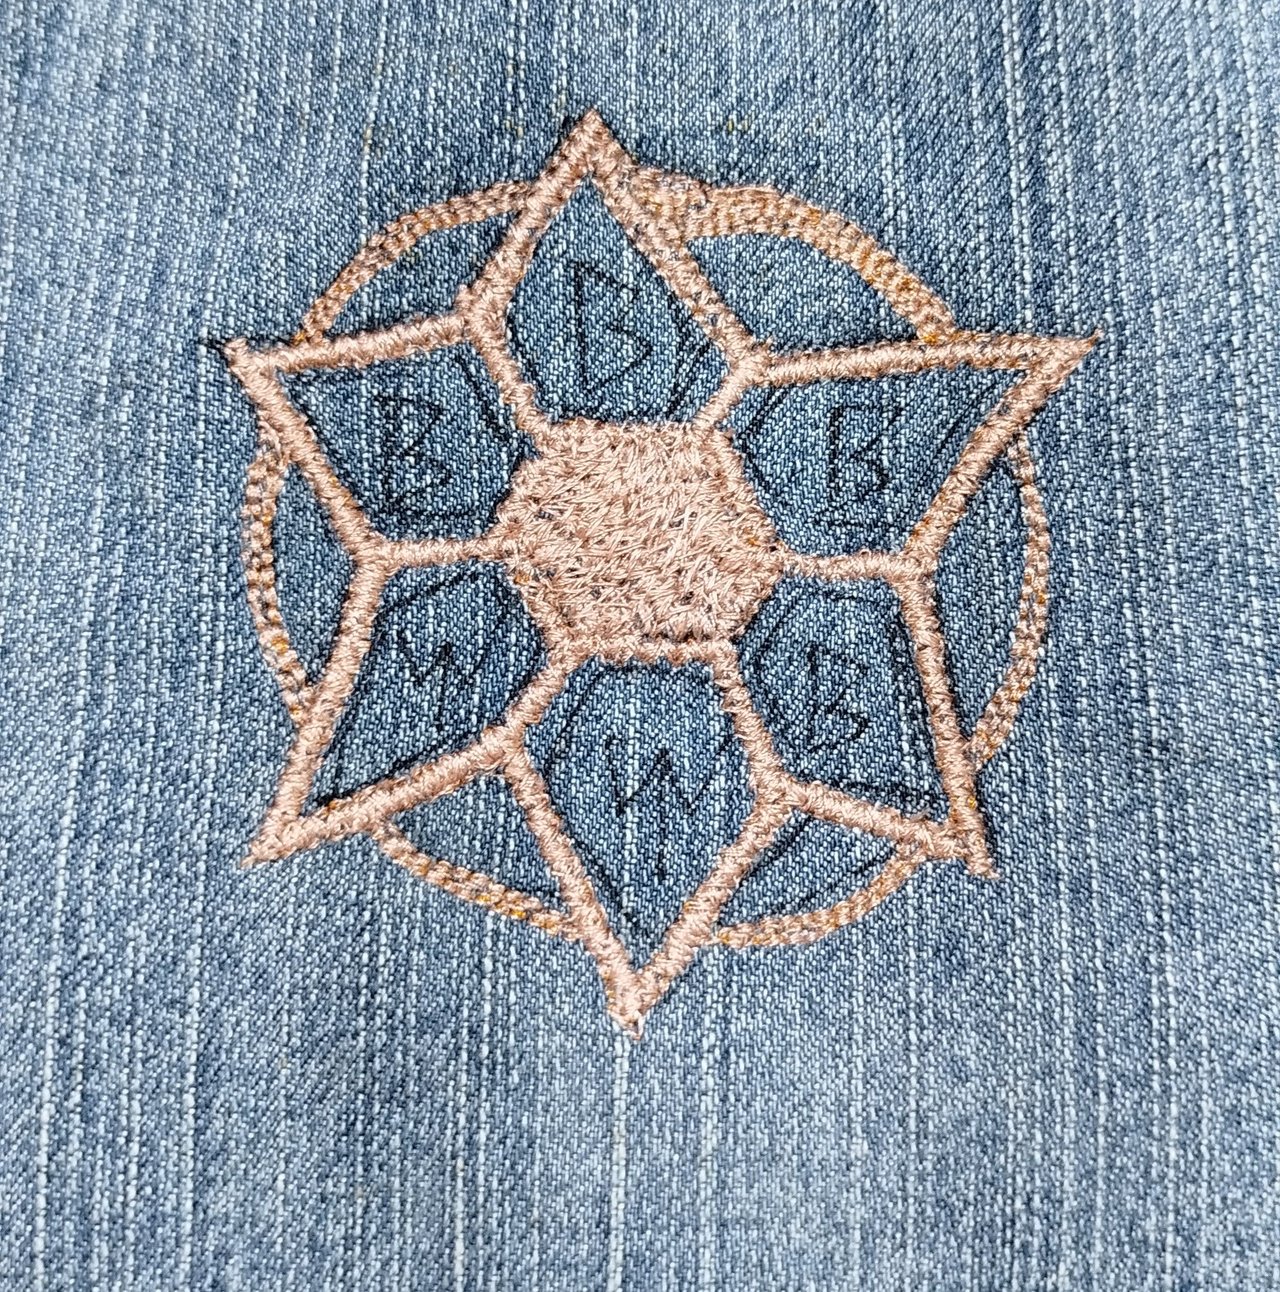
To do this, I first made the drawing on a piece of paper, and to transfer it to the fabric, I used carbon paper. For this case, I used a piece of blue jeans. Thanks to this pattern, I was able to guide myself when sewing. Once on the machine, I used a straight stitch to define the shape and filled in all the spaces with a fairly small zigzag stitch. I consider the technique to be more about filling in the "blank" spaces, so it's like drawing with the thread itself. Feel free to change the stitching if you need to, although generally, the zigzag stitch is more than enough to create any design 😊
 |  |  |
|---|
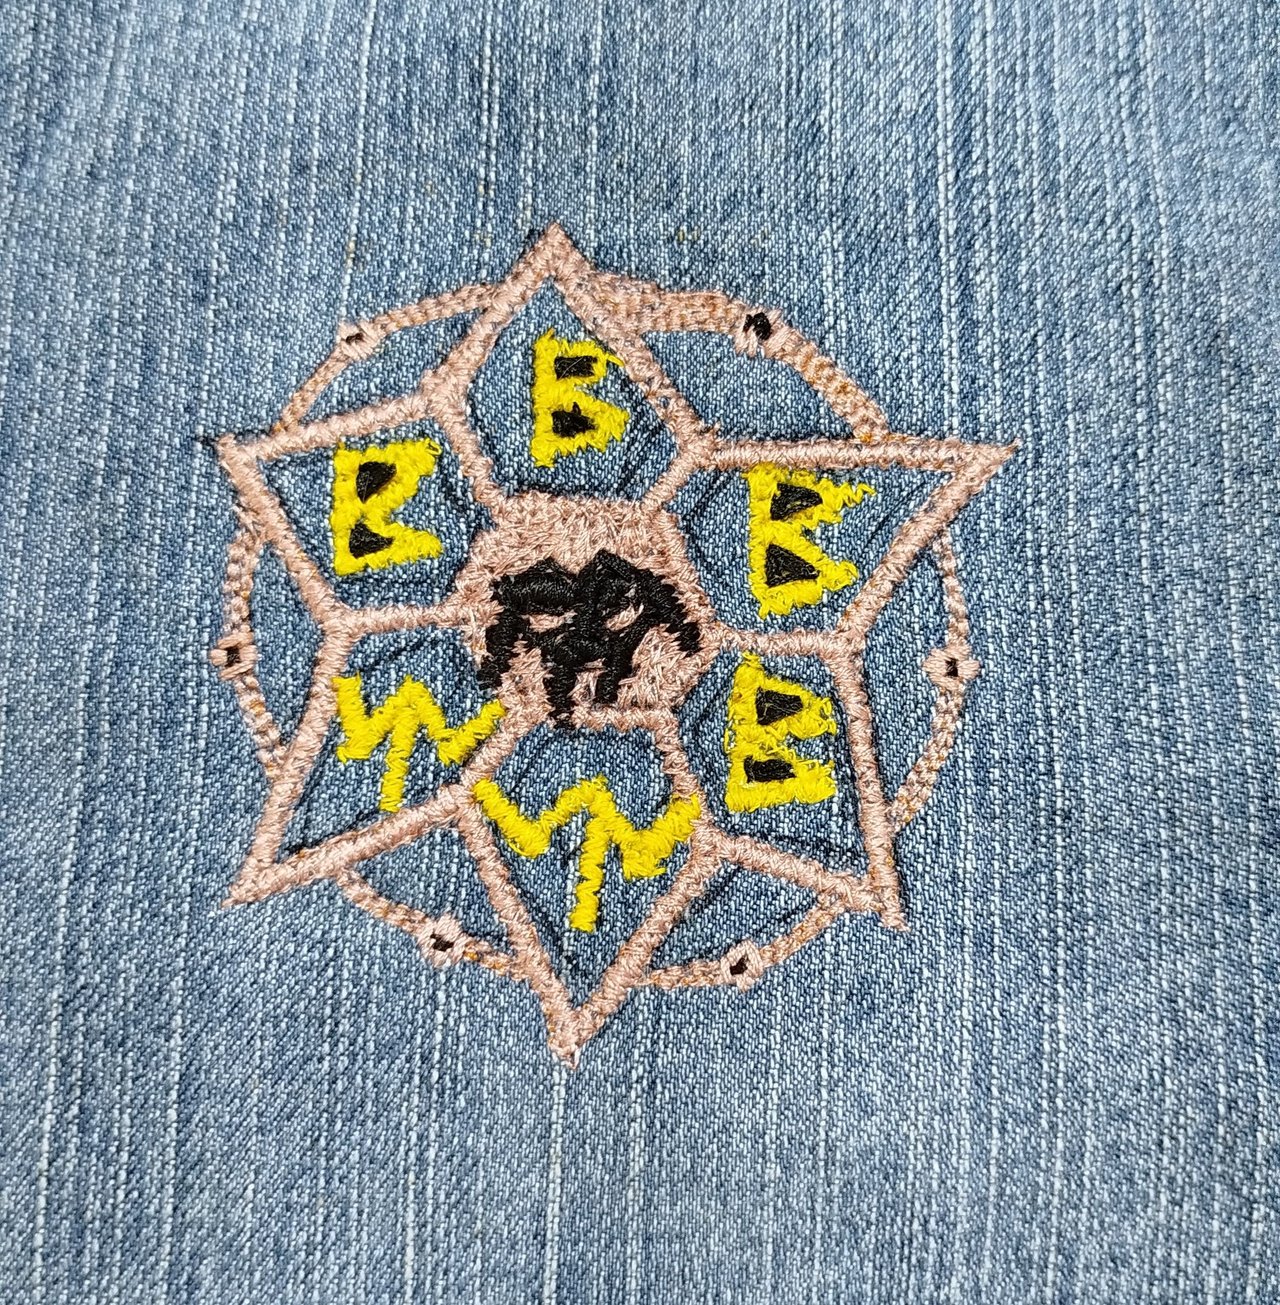
Once I had the embroidery design ready, I proceeded to sew the pillowcase as I explained above. This way, I had a personalized pillowcase using a piece of blue denim and some thread. As you can see, you can create beautiful embroidery using your home machine. We just need to trust our skills and practice. Personally, I would really like to improve this technique to create small pieces of embroidery, not only for personal use but also for sale. Would you dare to try it? ✨✂️
✨ Thank you so much for checking out my post. I hope you found it interesting ✨
💚 See you next time! 💚
CONTENIDO EN ESPAÑOL
¡Hola a todos los integrantes de esta comunidad y amantes de la costura! El día de hoy me gustaría mostrarles un pequeño proyecto que tenía en mente desde hacía tiempo: Elaborar fundas para teléfonos. La idea surgió después de un obsequio que me hicieron, hace unos años atrás. Un compañero de clases me obsequió una funda para mi teléfono celular, hecho por su madre quien es costurera. Yo quedé fascinada con el detalle, ya que adoro las manualidades y aprecio muchísimo que me obsequien algo hecho especialmente para mí.
La funda está hecha de material de blue Jeans, con un forro interno. Lo he estado usando desde entonces. Es ideal para cuando vas a guardar el teléfono, ya sea en un bolso o en tu bolsillo, protegiendo la pantalla del mismo. Muchas veces había visto a mi madre envolver su teléfono celular en una bufanda o en un gorro antes de guardarlo en el bolso y yo, siguiendo su ejemplo, hacía lo mismo. De modo que, al recibir aquella funda, me di cuenta de que realmente era útil. Pensando en ello, decidí entonces realizar unas cuantas para regalar y aprovechar de preguntarles a esas personas, qué tal le parecía su uso 😌
Los materiales a utilizar son fáciles de obtener. Basta con revisar nuestra bolsa o cesta de retazos y encontrar los que nos parezcan más lindos. En mi caso, seleccioné algunas telas estampadas que me sobraron de antiguos proyectos de costura.
Se necesita cortar un rectángulo que abarque el alto del teléfono más el aumento de costura, la cual nos va a servir como delantero y trasero; También se necesita una tela de forro, del mismo tamaño de la otra pieza (yo tenía un retazo, que luego corté en el proceso) y adicional, una tira de tela que es donde vamos a introducir el cordón que nos va a permitir cerrar nuestra funda. El cordón yo lo obtuve de mis retazos, pero podemos ingeniárnosla, ya que la funda que tengo para mi teléfono, tiene una agujeta de zapato 😉 Para los bordes del cordón yo utilicé unas cuentas de plástico, pero podemos hacer un nudo lo suficientemente grande para que el cordón no se salga o coserle algún otro detalle en las puntas... Ya saben cómo es: El límite es la imaginación 🌈
| |
|---|
Lo primero que hice, fue coser los bordes de la tira por donde iba a pasar el cordón. Esta pieza luego se doblaría y dentro de ella iría el cordón respectivamente. La pieza completa es de alrededor de unos 6 cm así que al doblarla quedaría de un alto de unos 3 cm.
Luego, doblé esta pieza y la ubiqué en el medio de la tela principal y el forro, cosiendo con una costura recta. Quedando como se aprecia en las fotografías.
| |
|---|
| | |
|---|
Seguidamente, enfrenté los lados derechos y procedí a coser con una costura recta por todo el borde de las piezas, dejando una pequeña abertura en la parte del forro, para poder voltear el trabajo (en esta parte, yo aproveché de colocar una pequeña etiqueta, como mi sello personal 😉).
| | |
|---|
Una vez que volteé la pieza, procedí a cerrar la abertura con una costura recta e introduje el forro dentro de la funda. Al colocarle el cordón, la funda estuvo lista ✨
| | |
|---|
Como pudieron ver, se trata de un proyecto sumamente fácil y económico. Hasta pienso que se puede realizar con una costura a mano, sin mucha dificultad (en el caso de que no se posea una máquina de coser). Con tela estampada se pueden obtener diseños bastante lindos y se pueden hacer para uso personal, obsequio o para vender.
En mi caso, yo le obsequié uno a mi madre, a mi abuela y a unas amigas. Mi madre quedó encantada ya que como les había mencionado, ella solía envolver su teléfono en un gorro o en una bufanda. No saben lo feliz que me hace cada vez que ella viene a visitarme y al sacar su teléfono de su bolso, siempre está en su funda 😊 Por otro lado, mi abuela no suele salir mucho de su apartamento, pero cuando le comenté que yo solía guardar mi teléfono en mi funda antes de meterlo en la gaveta donde suelo guardarlo por las noches, ella exclamó "¡Perfecto!" 😌
🌈 Una idea extra de decoración 🎨
Si deseamos realizar una funda más especial, podemos hacer algo como bordar a mano el nombre o las iniciales de la persona en la tela, antes de elaborar la funda, hacer lo mismo pero con un dibujo, pintado con pintura de tela o como la idea que estoy por mostrarles, que es bordar con la máquina de coser, alguna figura representativa. En este caso, la funda era para obsequiársela a mi novio que es jugador de Summoners War. Él quería que le hiciera la figura de una runa de invocación del juego... o algo así 😅
Podría haber hecho el dibujo con pintura para tela y opino que hubiera sido mucho más fácil, pero como no tenía dicho material, me quise arriesgar a utilizar mi máquina de coser. Ya había hecho un bordado con anterioridad, así que quería volver a intentarlo. La vez pasada en cambio, había retirado el pie de máquina y bajado los dientes de mi máquina de coser, como indicaba el manual de instrucciones que debía hacerse, a la hora de realizar bordados. Pero en esta ocasión, quise intentar bordar sin hacer esto, debido a que había visto a un chico a través de Instagram, que hacía bordados con una máquina casera, sin retirar el pie, ni bajar los dientes de la máquina de coser (o sea, como cuando coses normalmente).
| | |
|---|
Para ello, primero hice el dibujo en un trozo de papel y para trasladar el mismo a la tela, utilicé papel carbón. En esta funda si utilicé un trozo de blue Jean. Gracias a este patrón, pude guiarme a la hora de coser. Una vez en la máquina, utilicé una costura recta para definir la figura y rellené todos los espacios con una costura en zigzag bastante pequeña. Considero que la técnica se trata más que nada, de rellenar los espacios "en blanco", así que es como dibujar con el propio hilo. Siéntanse libres de cambiar el tipo de costura si lo necesitan, aunque por lo general, con la costura en zigzag es más que suficiente para sacar cualquier dibujo 😊
| | |
|---|
Una vez que tuve el bordado del dibujo listo, procedí a coser la funda como se los expliqué anteriormente. De esa forma, obtuve una funda personalizada utilizando un trozo de blue jean y algo de hilo. Como pudieron ver, se puede realizar un lindo bordado utilizando nuestra máquina casera. Sólo debemos confiar en nuestras habilidades y practicar. En lo personal, me gustaría muchísimo mejorar esta técnica para hacer pequeños bordados, no sólo para uso personal, sino también para la venta. Y ustedes ¿Se animarían a hacerlo? ✨✂️
✨ Muchas gracias por haber visitado mi publicación. Espero que les haya parecido interesante ✨
💚 ¡Hasta una próxima oportunidad! 💚

Comments