DIY: Three In One Keychain [ENG/SPA]
4 comments

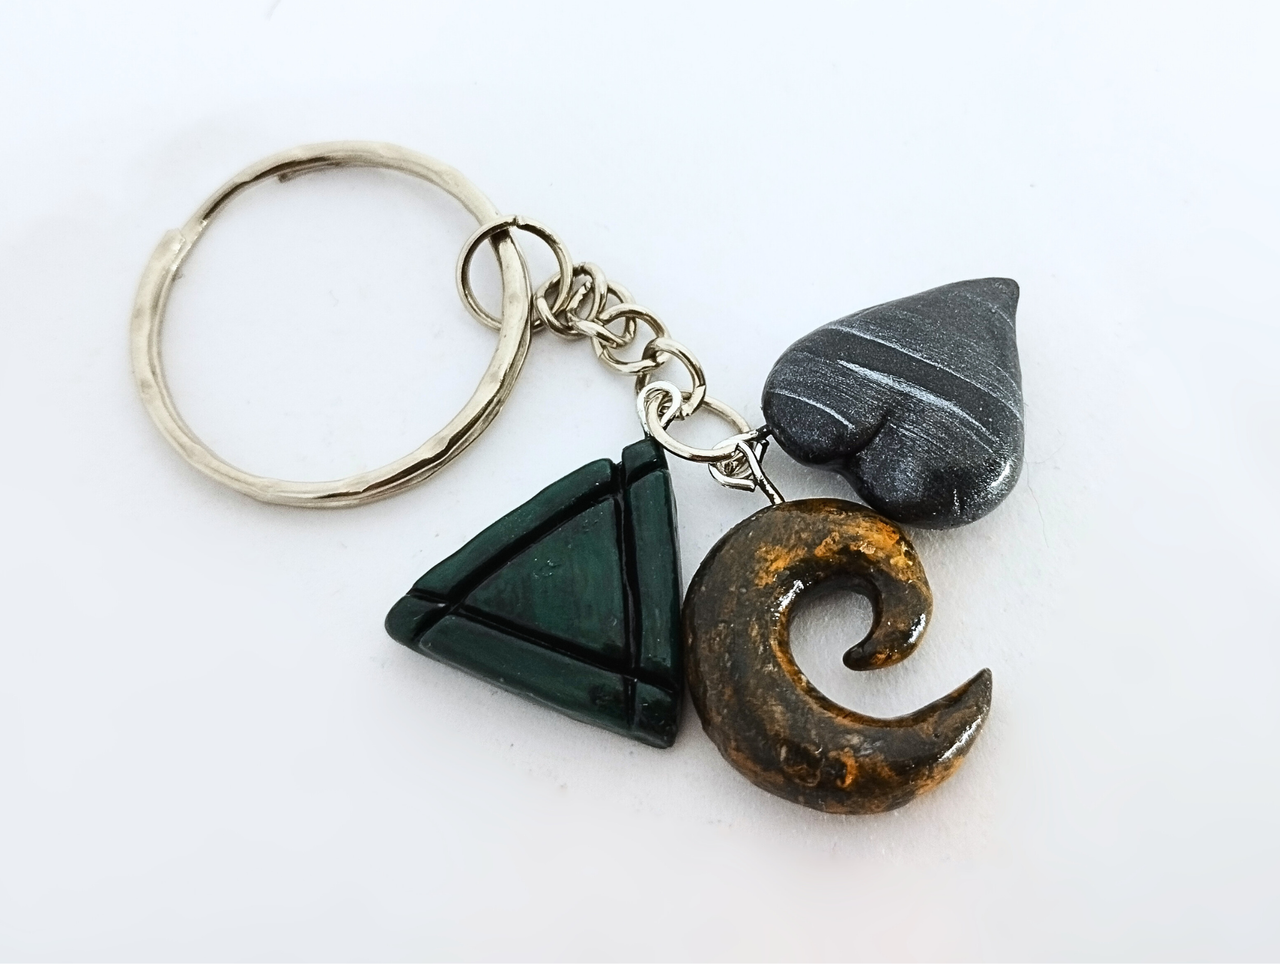
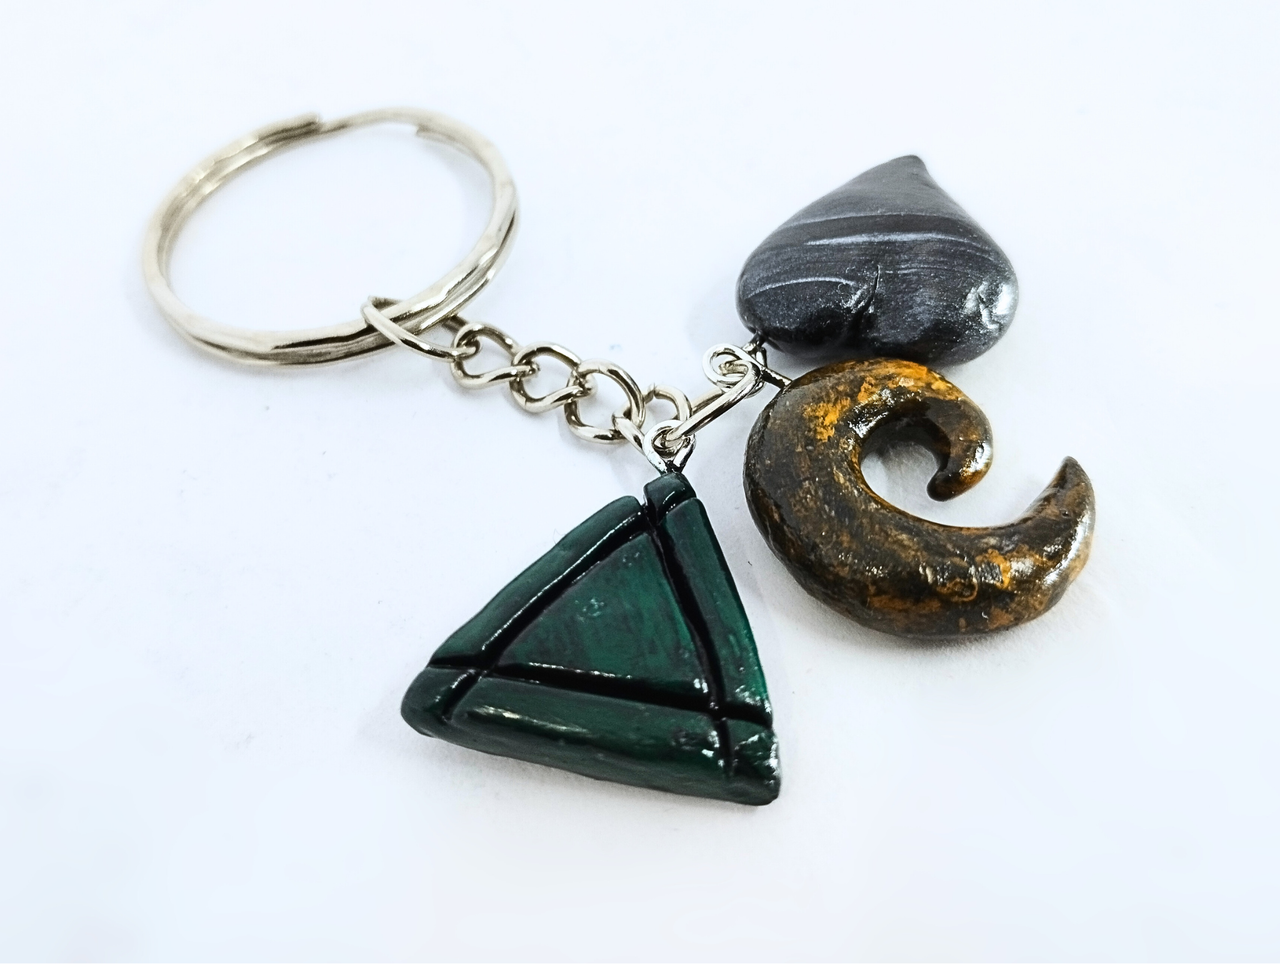
Greetings friends. I recently got a request for a keychain with three specific shapes and three specific colors, a heart, a spiral and a triangle, the heart being black, the spiral brown and the triangle green.
I had to think it through because I wanted to do something that I had not done before and was original for this keychain. As there were three pieces, they could not be so big so I had to be ingenious not only in the size but also in the designs; however I managed to make something original and beautiful, as you can see in the image below.
I invite you to join me in the step by step of this beautiful keychain.
Español
Saludos amigos. Hace poco me hicieron una solicitud para un llavero con tres formas y tres colores específicos, un corazón, un espiral y un triángulo, siendo el corazón de color negro, el espiral marrón y el triángulo verde.
Tuve que pensarlo bien porque quería hacer algo que no hubiese hecho antes y fuese original para este llavero. Al ser tres piezas tampoco podían ser tan grandes así que debía ingeniarmelas no solo en el tamaño sino también en los diseños; son embargo logré hacer algo original y bello, tal cómo pueden ver en la imagen que está un poco mas abajo.
Los invito a acompañarme en el paso a paso de tan lindo llavero.
Step by step
Although in the image they appear to be carved stones, the truth is that these three key chains are made of flexible dough, decorated with paint and covered with glue, plus I used wire for the rings that would hold it to the largest ring of the key chain.
Paso a paso
Aunque en la imagen parecen ser piedras talladas, lo cierto es que estos tres llaveritos están hechos de masa flexible, decorados con pintura y cubiertos con pegamento, además de que usé alambre para las argollas que lo sujetaría a la argolla más grande del llavero.
To begin with, I selected the small pieces of flexible dough that I would use. This is the first thing to do, select the amount of material to use and store the rest well, so that it does not dry out when exposed, as this material dries in the air.
Para empezar seleccioné los trocitos de masa flexible que usaría. Esto es lo primero que hay que hacer, seleccionar la cantidad de material a utilizar y guardar bien el resto, para que no se seque al estar expuesto, pues este material se seca al aire.

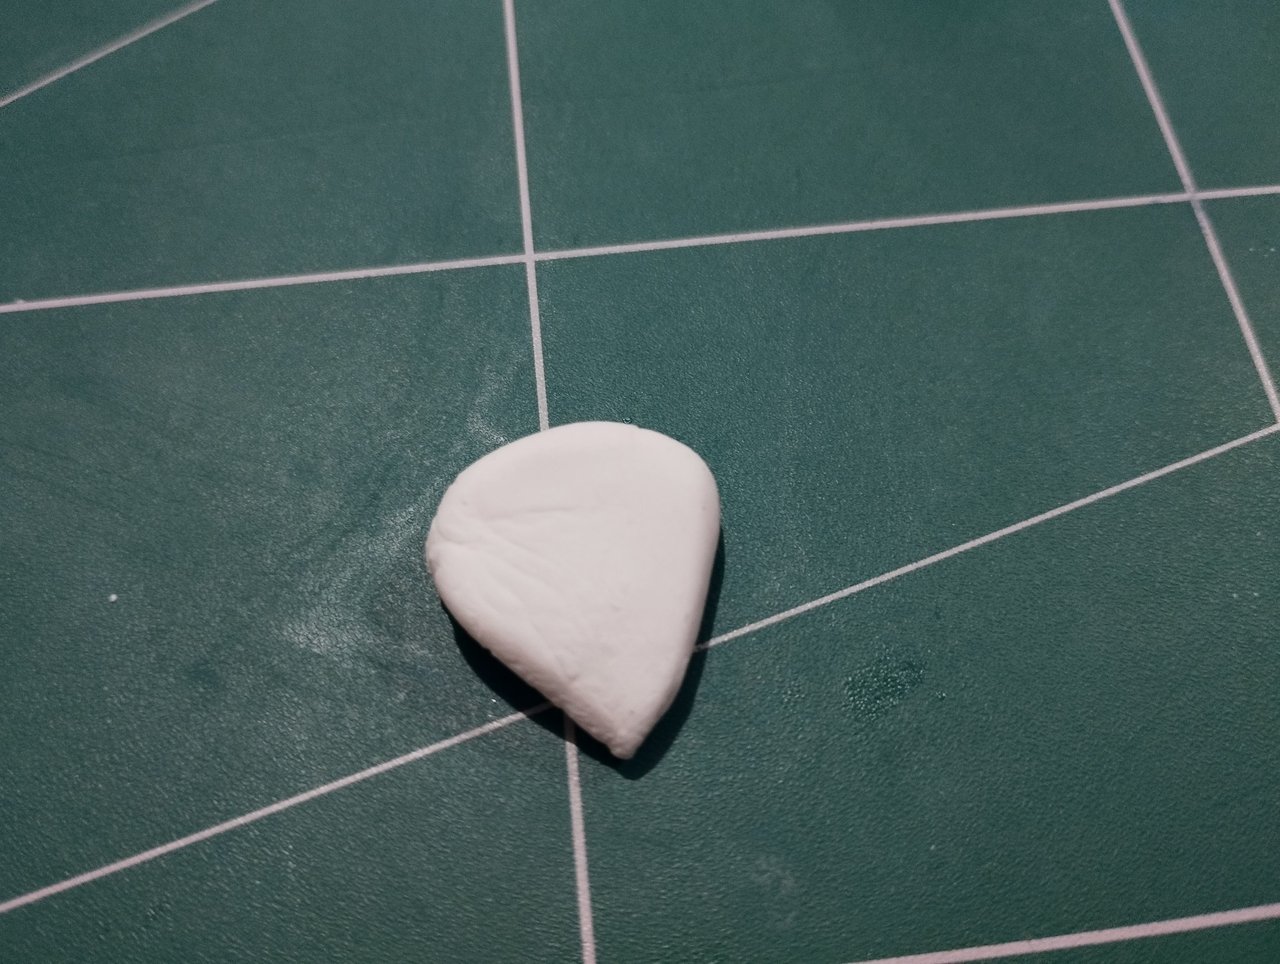
Well, after selecting the three little pieces of material I started to mold it.
The first one is a heart. To make this pendant you start with a shape similar to an inverted triangle, with one of the sides down and a little rounded at the top, as shown in the image below.
Bien, después de seleccionar los tres trocitos de material comencé a moldearlo.
El primero es un corazón. Para hacer este dije se comienza con una forma similar a un triángulo invertido, con uno de los vimos hacía abajo y un poco redondeado en la parte superior, tal cómo se observa en la imagen de abajo.
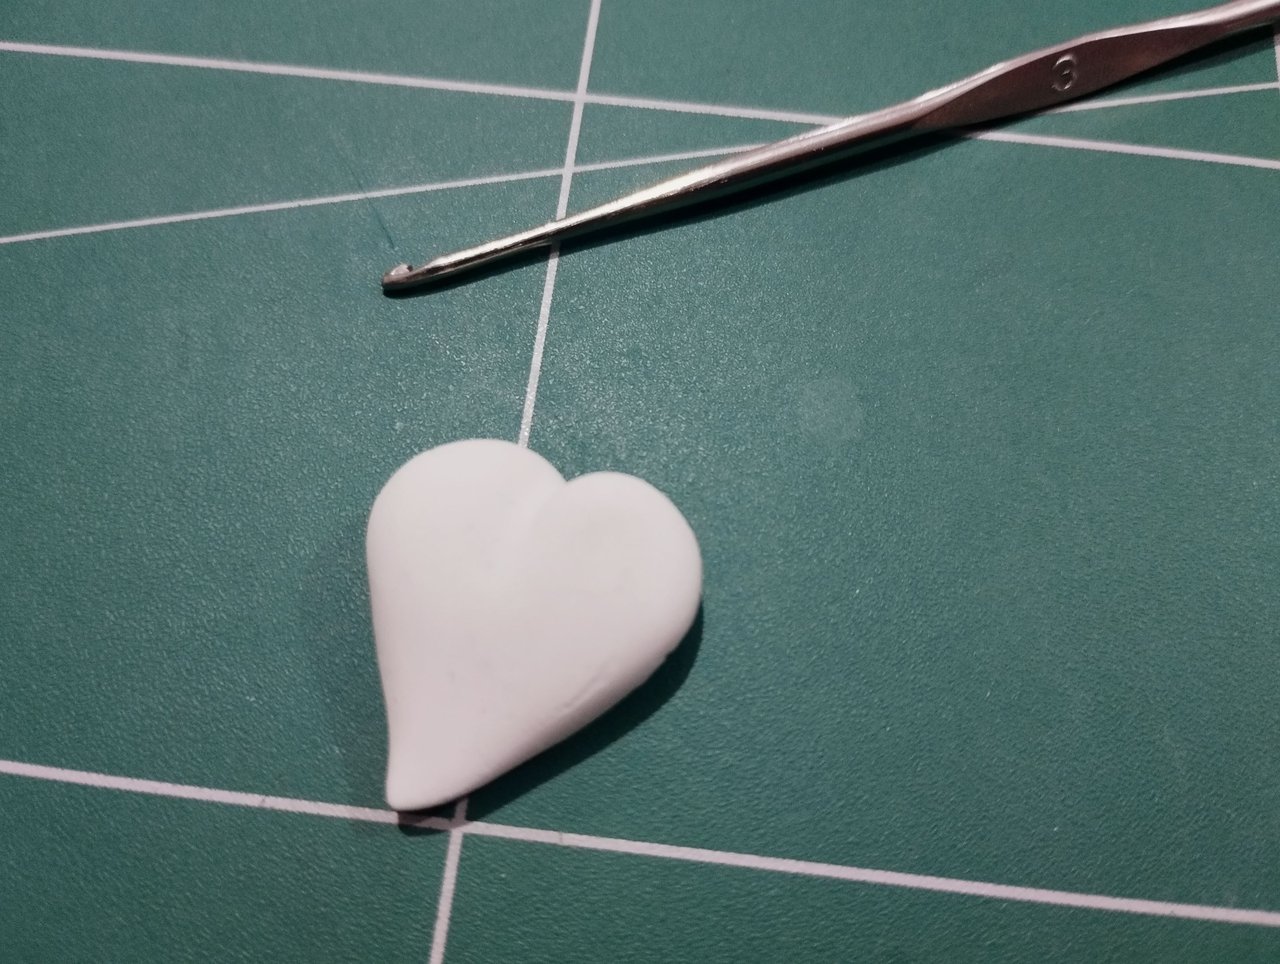
This is the initial shape but other things must be done to achieve the desired shape. To begin with, the surface must be smoothed and wrinkles removed, which is difficult to do and must be completed quickly before it dries, as there is a risk of cracking the material.
Once this is done, the knitting needle is used to make a diagonal slit at the top to divide the rounded parts of the heart in two.
Esa es la forma inicial pero se deben hacer otras cosas para que logré la forma deseada. Para empezar se deben alisar la superficie y eliminar arrugas, algo difícil de hacer y que debe completarse rápidamente antes de que seque, ya que se corre el riesgo de que se agriete el material.
Una vez hecho esto, se usa la aguja de tejer, para hacer una hendidura en diagonal en la parte superior, para dividir en dos las partes redondeadas que tiene el corazón.
The heart is ready. Now for the triangle it is basically the same, only you have to shape it progressively until you create an almost perfect triangular shape.
Así está listo el corazón. Ahora para el triángulo es básicamente lo mismo, solo que hay que moldear de manera progresiva hasta crear una forma triangular casi perfecta.
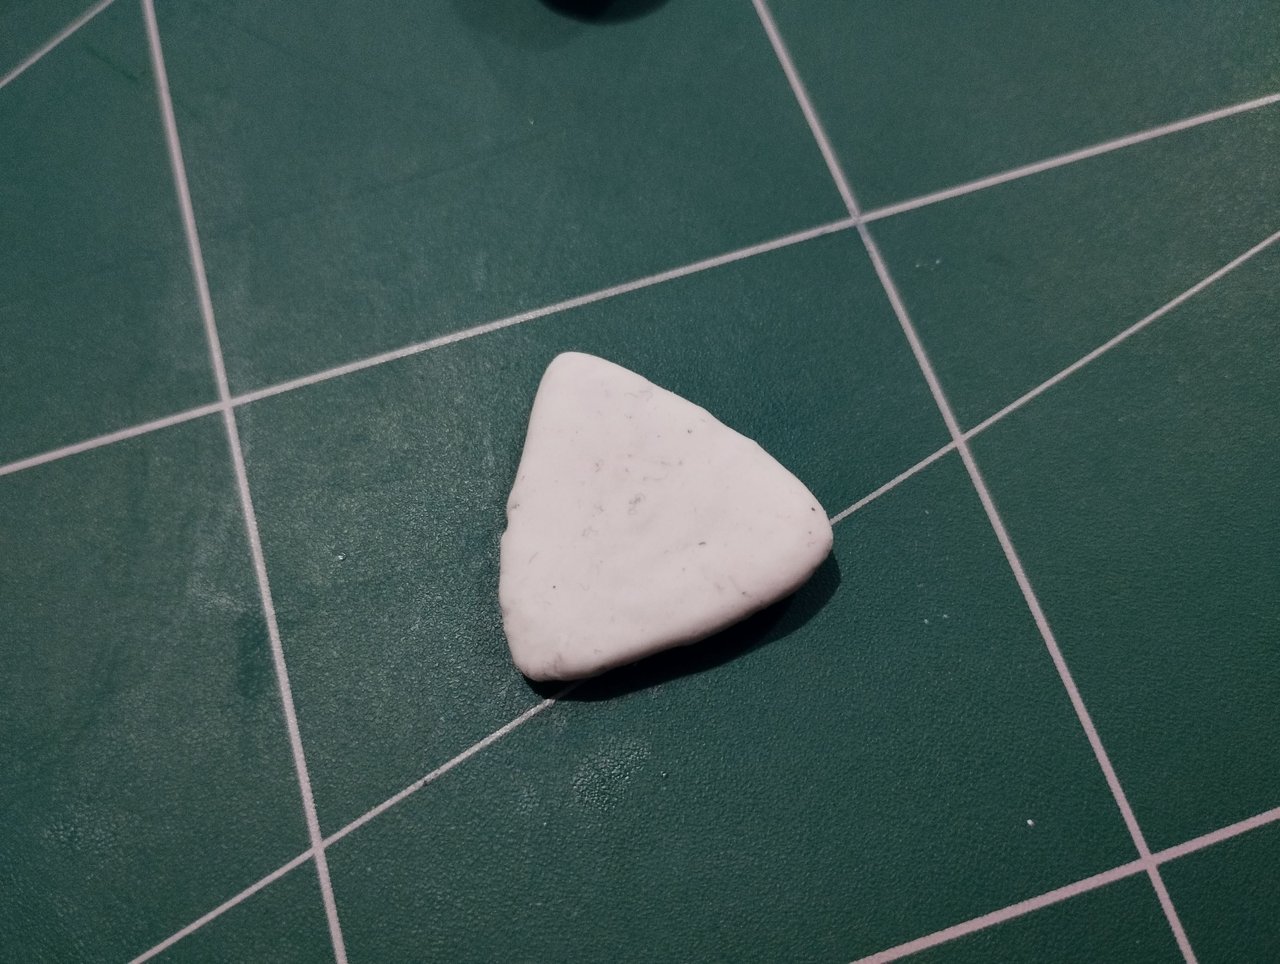
Of course, I didn't want to just make a simple triangle, but I made three lines on the inside of each side of the triangle, crossing each of the lines with each other, as you can see in the image below.
I helped myself with the sharp point of the cutter to make this line.
Por supuesto, no quise hacer un triángulo sencillo y ya, sino que me hice tres líneas en la cara interna de cada lado del triángulo, cruzando cada una de las líneas entre sí, tal como pueden ver en la imagen de abajo.
Me ayudé con la punta afilada del cutter para hacer esta línea.

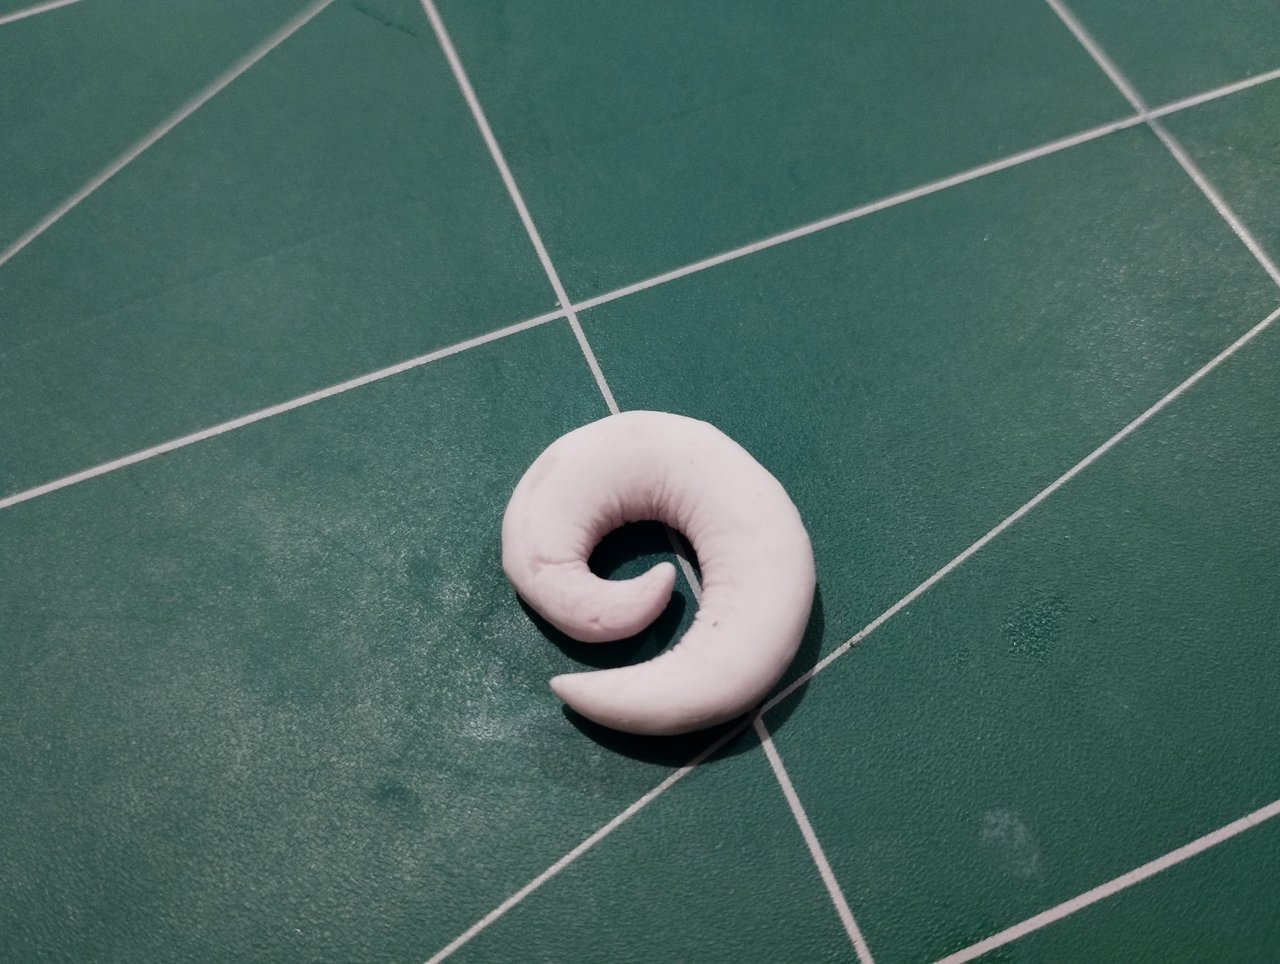
The last one was the spiral. Although it is not a long spiral, I did make a spiral shape, for this I simply started by making a little worm with the flexible dough.
El último fue el espiral. Aunque no es espiral largo, sí hice una forma de espiral, para esto simplemente comencé haciendo un gusanito con la masa flexible.
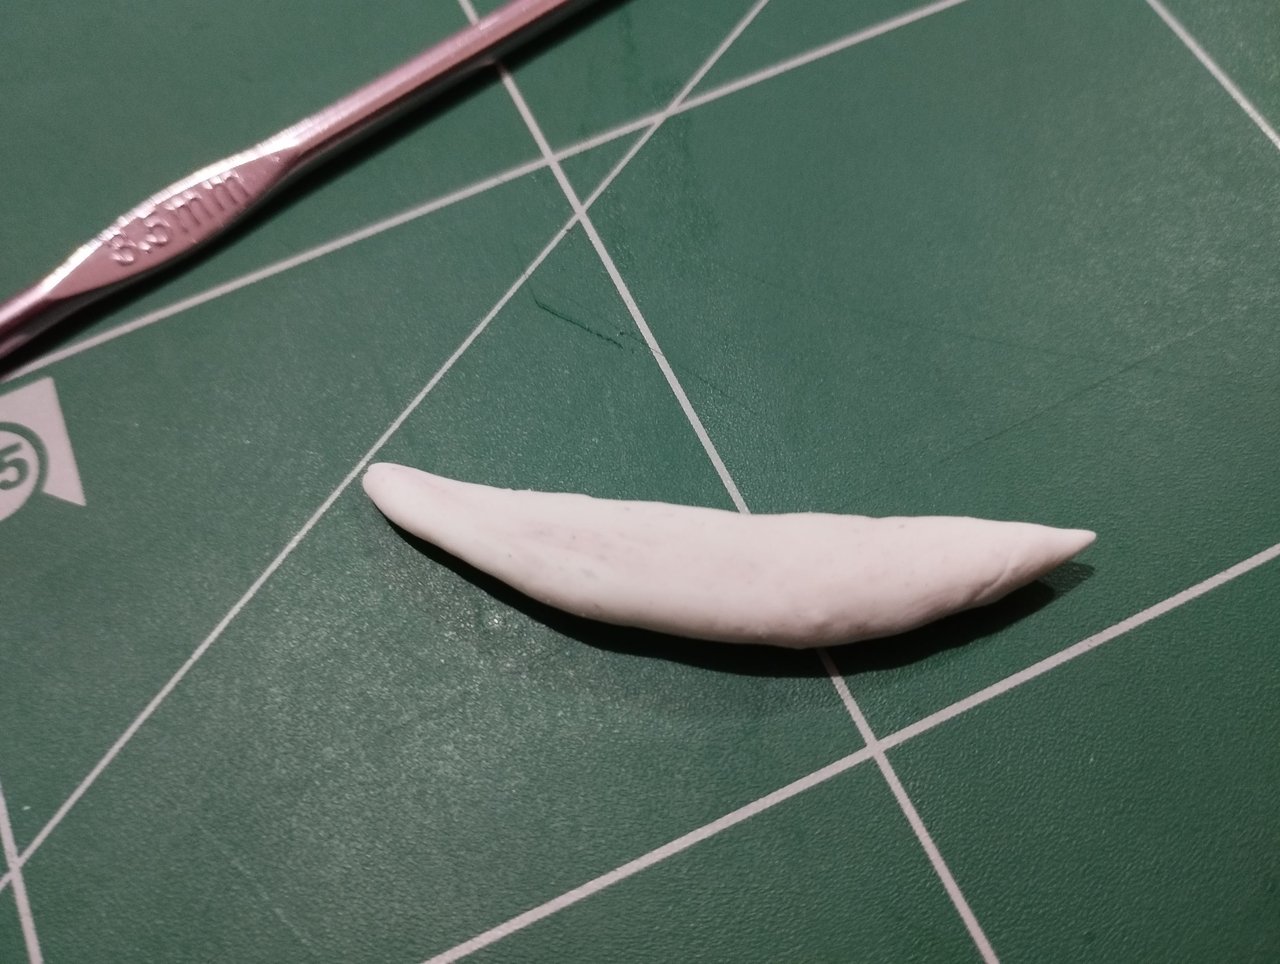
This worm shape I simply twisted it inside itself, creating the little spiral. To keep the shape I had to place some small pieces of wire at three points of the spiral.
Esta forma de gusanito simplemente la gire dentro de si, creando el pequeño espiral. Para que mantuviera la forma tuve que colocar algunos trocitos de alambre en tres puntos del espiral.
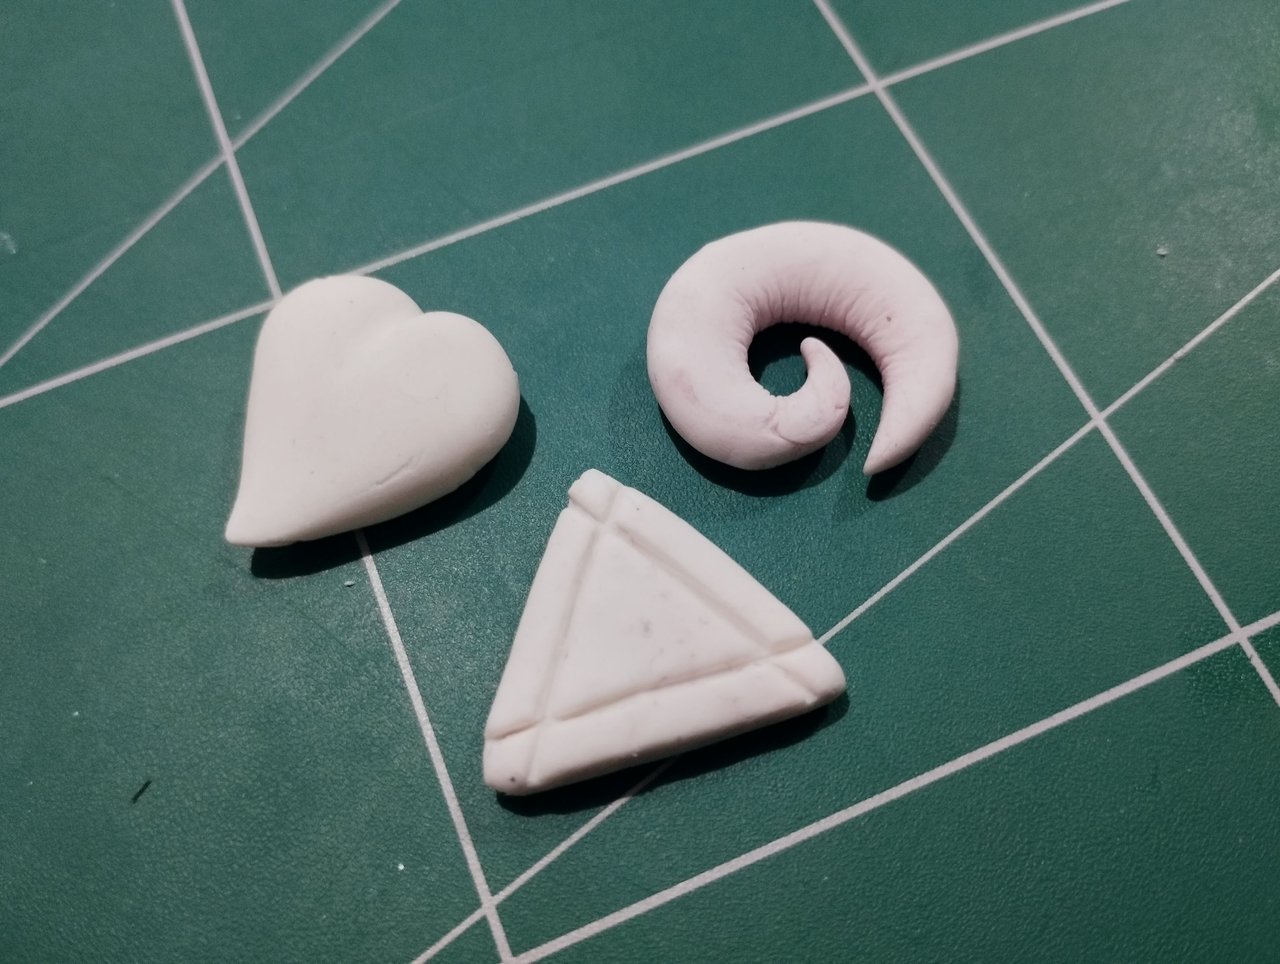
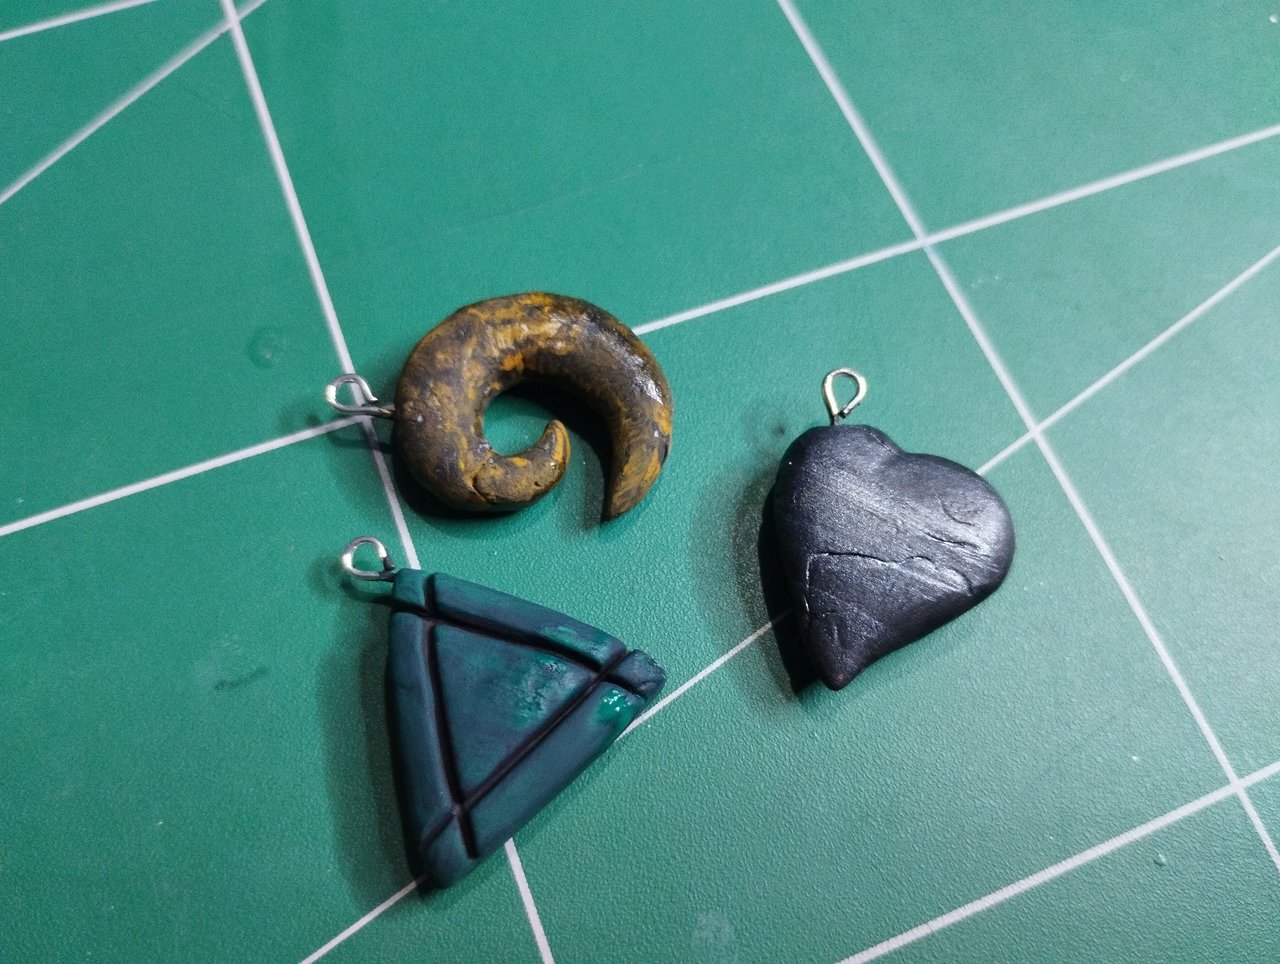
This is how the three pieces were left in the dry material, unpainted. Now it was time to color the pieces.
Así quedaron las tres piezas en el material seco, sin pintar. Ahora era tiempo de colorear las piezas.
I painted all the pieces black as a base color.
The heart I painted black, although I didn't want to paint it completely dark, I did give it some silver brushstrokes, so that those diagonal lines along the heart would remain.
I painted the triangle green, without painting the bas-relief lines that I had made before with the cutter, which were now black and stood out against the new green color.
Finally, I painted the spiral irregularly with a light brown, giving the appearance of a carved stone.
A todas las piezas las pinté de color negro como base.
El corazón lo pinté de color negro, aunque no quise pintarlo completamente oscuro, sí le di algunas pinceladas de plateado, para que quedarán esas líneas en diagonal a lo largo del corazón.
El triángulo lo pinté de verde, sin pintar las líneas en bajorrelieve que había hecho antes con el cutter y que ahora era negras y resaltaban sobre el nuevo color verde.
Finalmente el espiral lo pinté de manera irregular con un marrón claro, dando la apariencia de una piedra tallada.
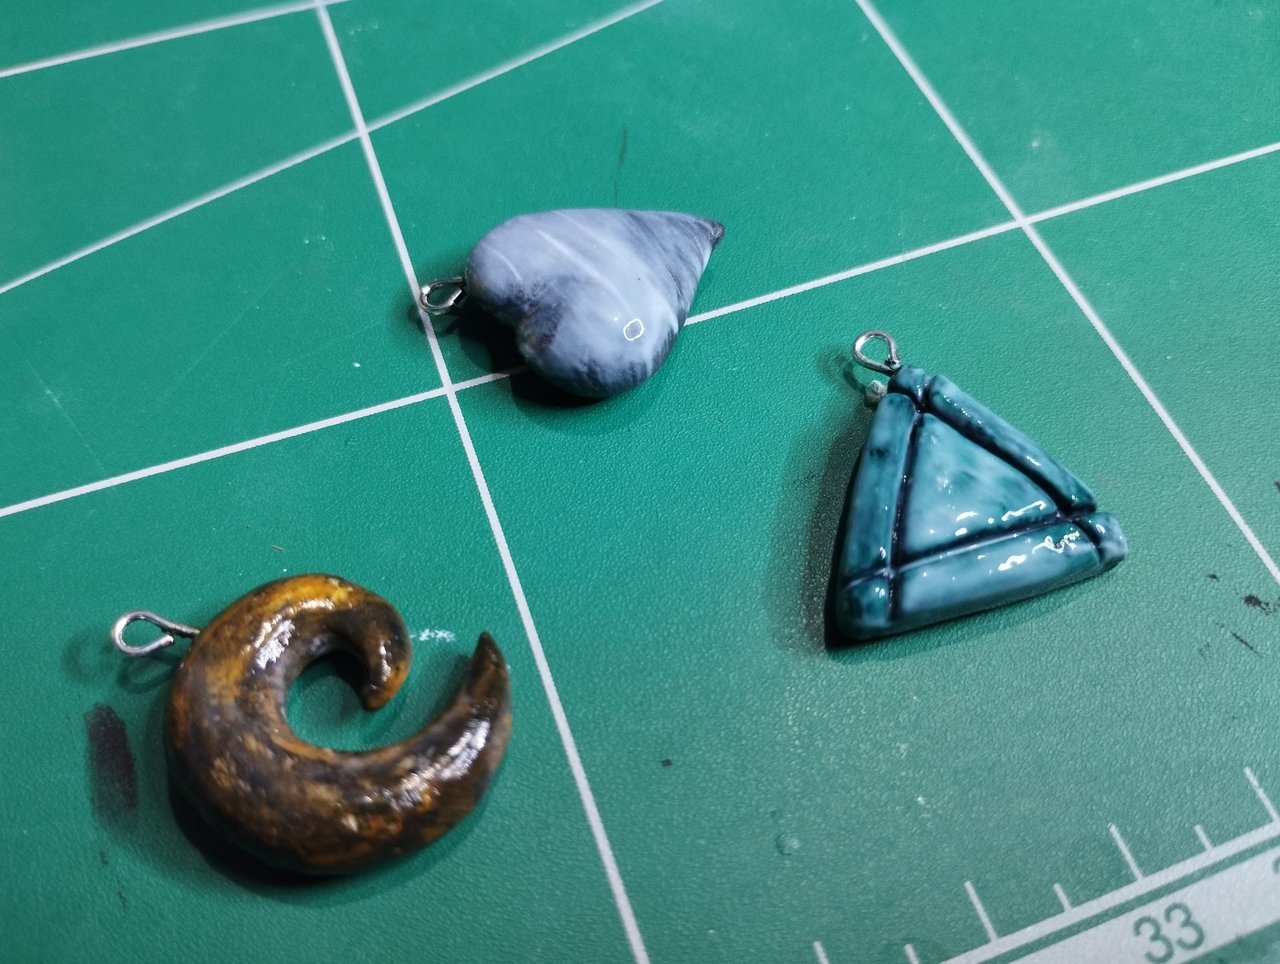
As I said, to protect these pieces I used glue, a few coats to harden the pieces. I did this after the paint had dried, so that the glue would not take the color of the paint, but would dry transparently.
Como dije, para proteger estas piezas usé pegamento, unas cuantas capas para endurecer la piezas. Esto lo hice después de que secó la pintura, para que el pegamento no tomara el color de la pintura, sino que secara de manera transparente.
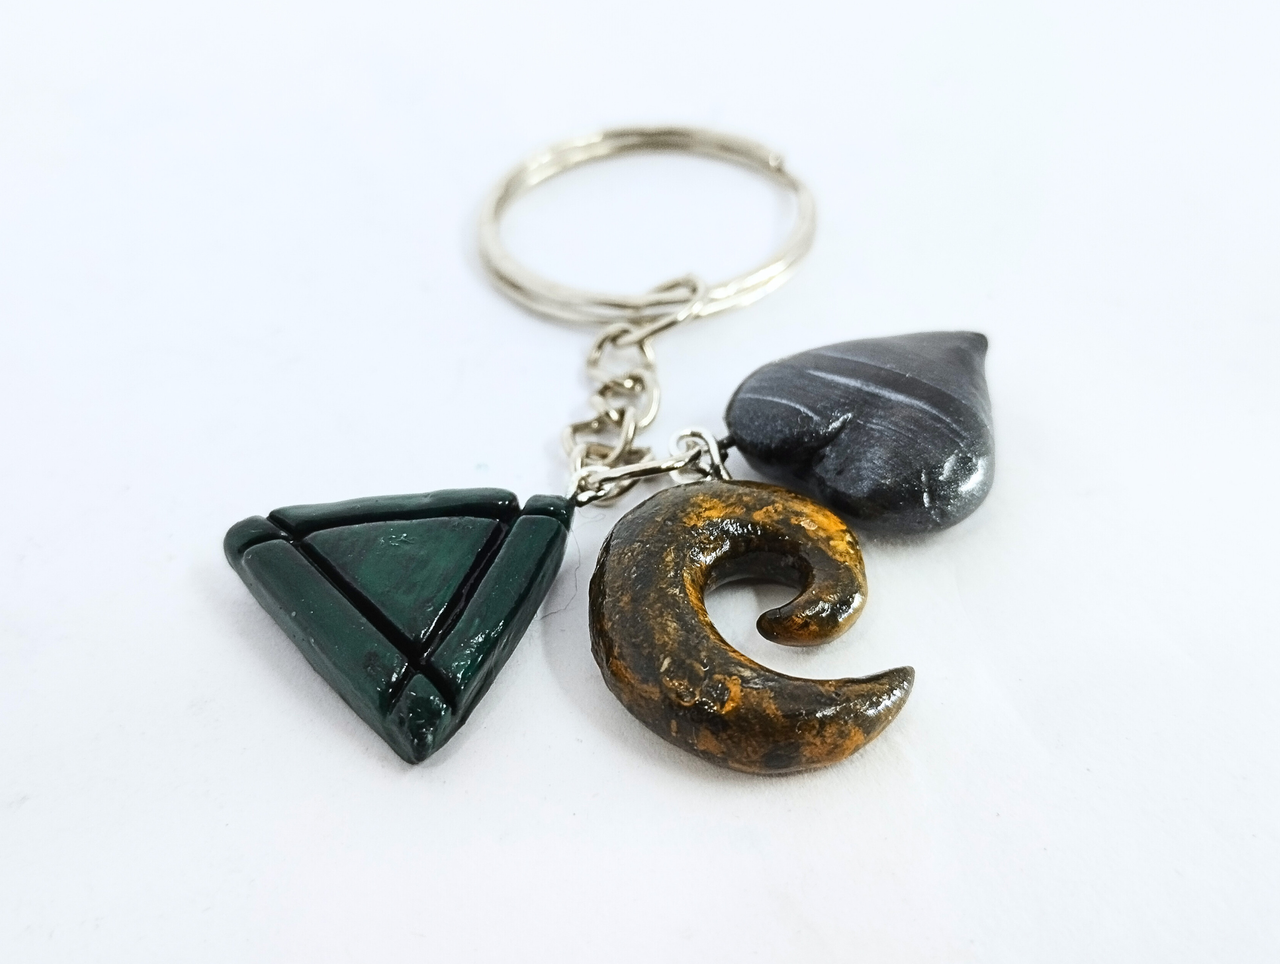
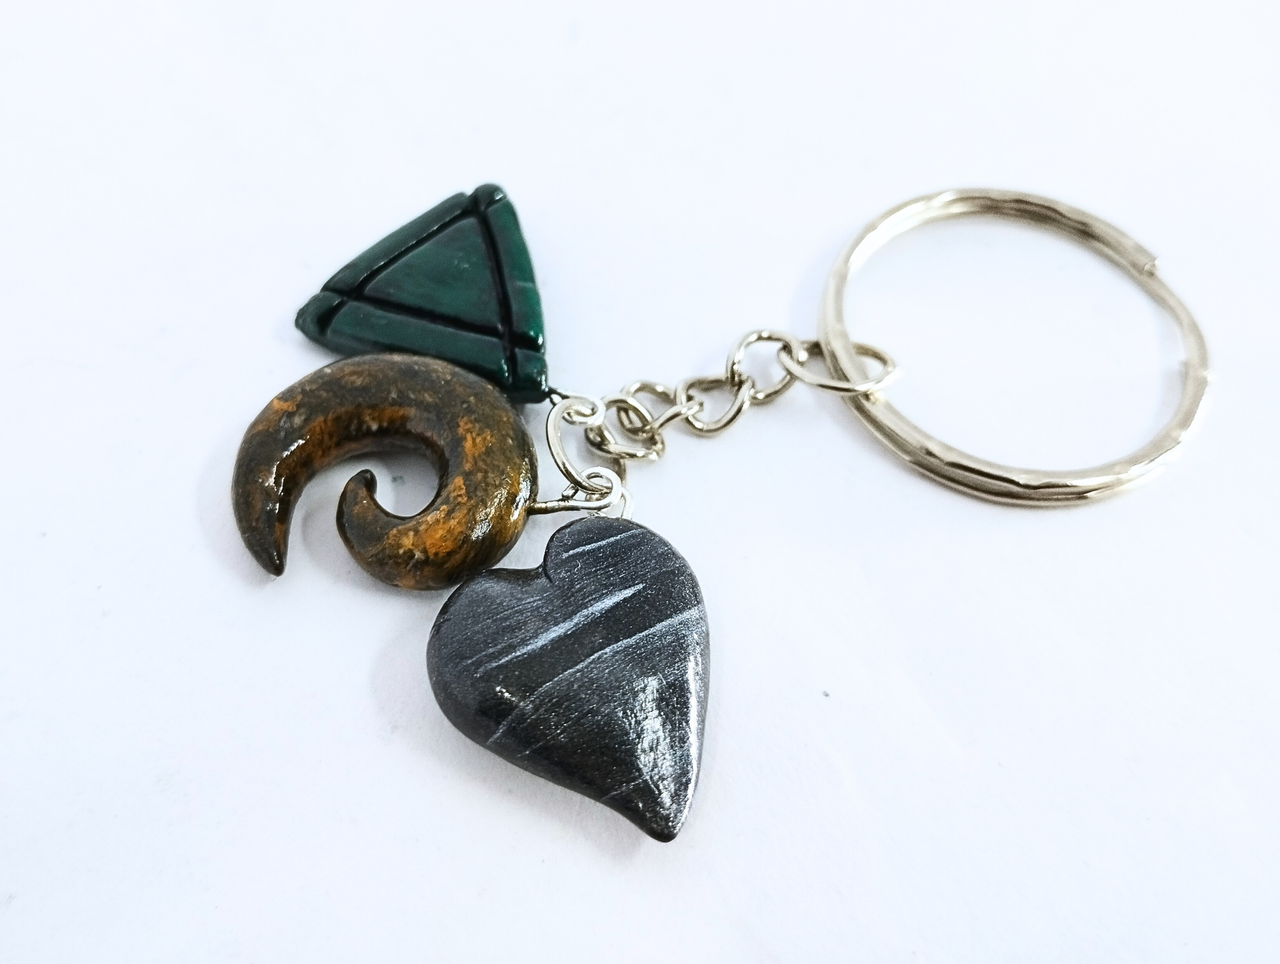
In this way the key rings were finished, being the last step to place them in their ring.
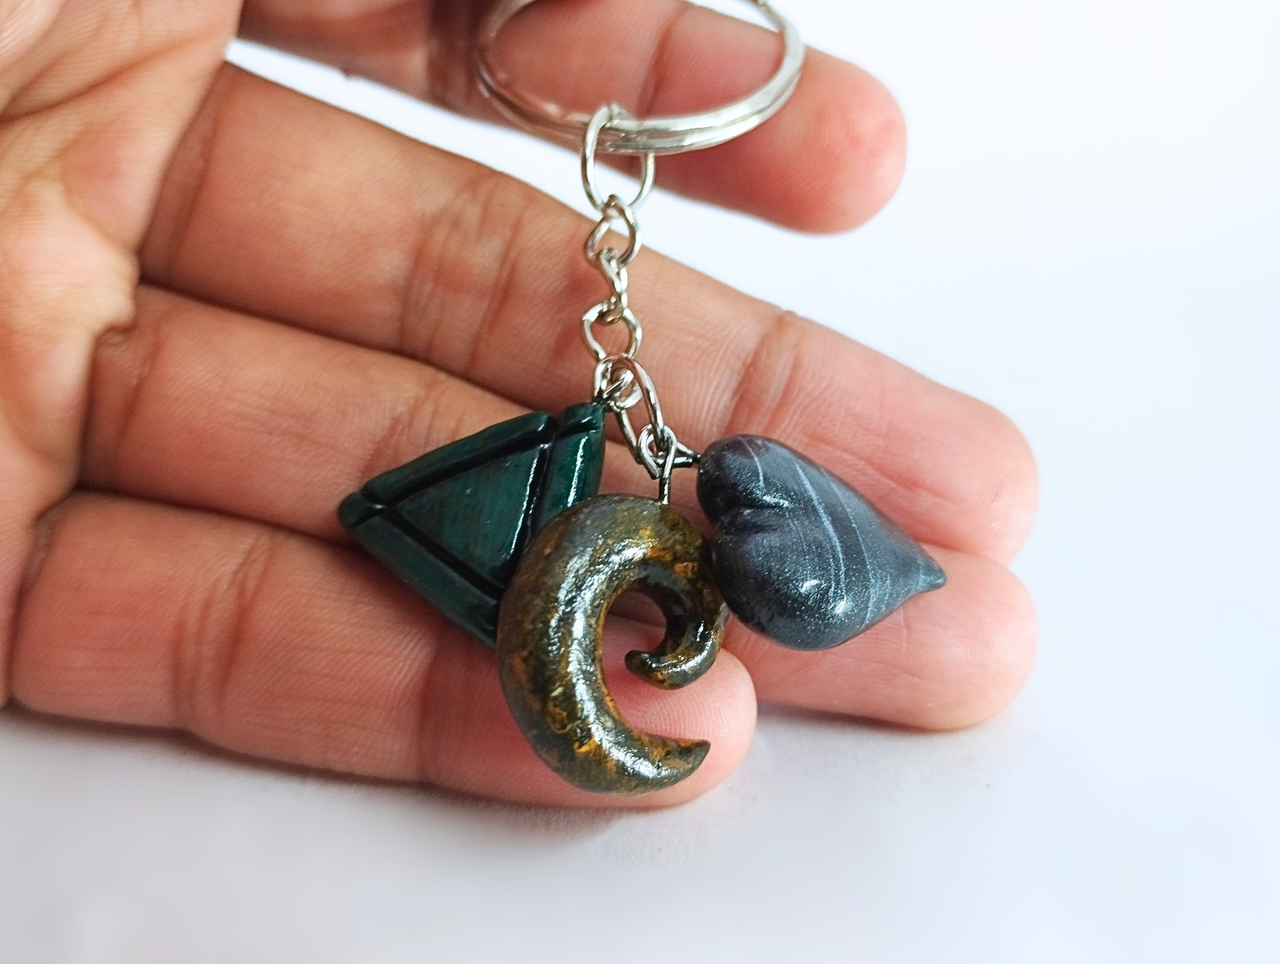
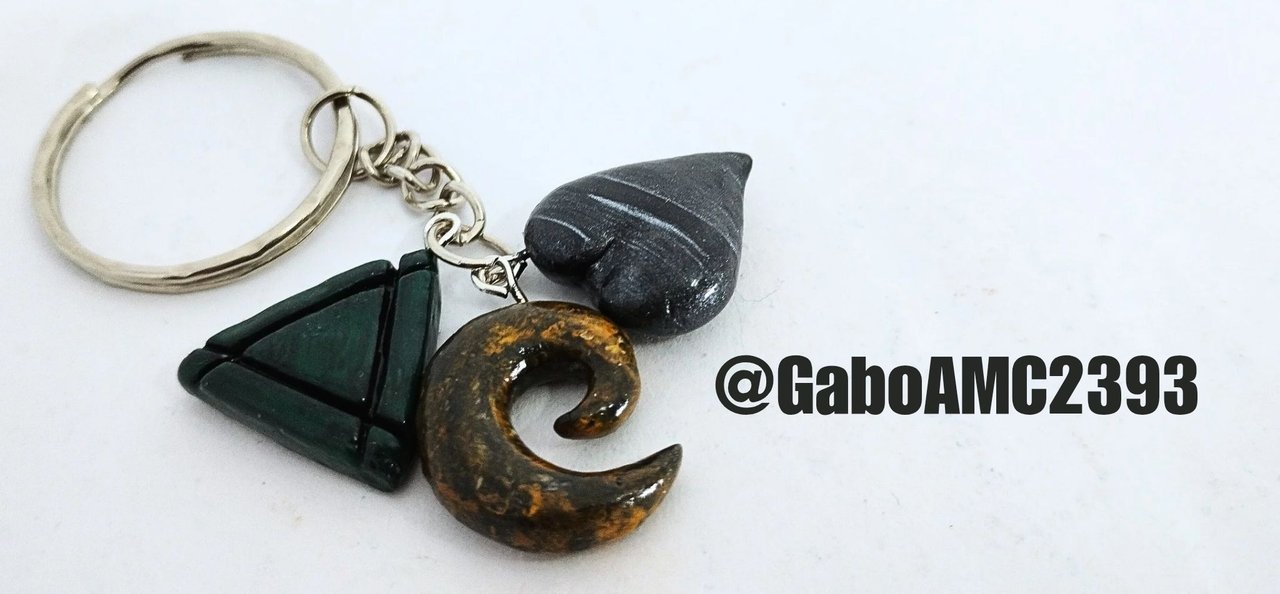
Below you can see a series of pictures of the final result:
De esta manera los llaveros quedaron terminados, siendo el último paso colocarlas en su argolla.
A continuación pueden ver una serie de fotografías del resultado final:
Well folks, that's all for now. I hope you liked my three in one keychain. I invite you to leave your opinions below in the comments, as always I will be happy to read them. With nothing more to add I'll say goodbye then...
See you next time!
Bien amigos, esto ha sido todo por ahora. Espero que mi llavero tres en uno les haya gustado. Los invito a dejar sus opiniones abajo en los comentarios, como siempre estaré encantado de leerlos. Sin más que agregar me despido entonces...
¡Hasta la próxima!
Comments