Recommended Posts


"Capture Device" Step-by-Step rendering Technique
30 comments
Welcome to the sharing of item rendering! Whether you're a seasoned artist or just starting out, this tutorial will walk you through the steps to create compelling items.
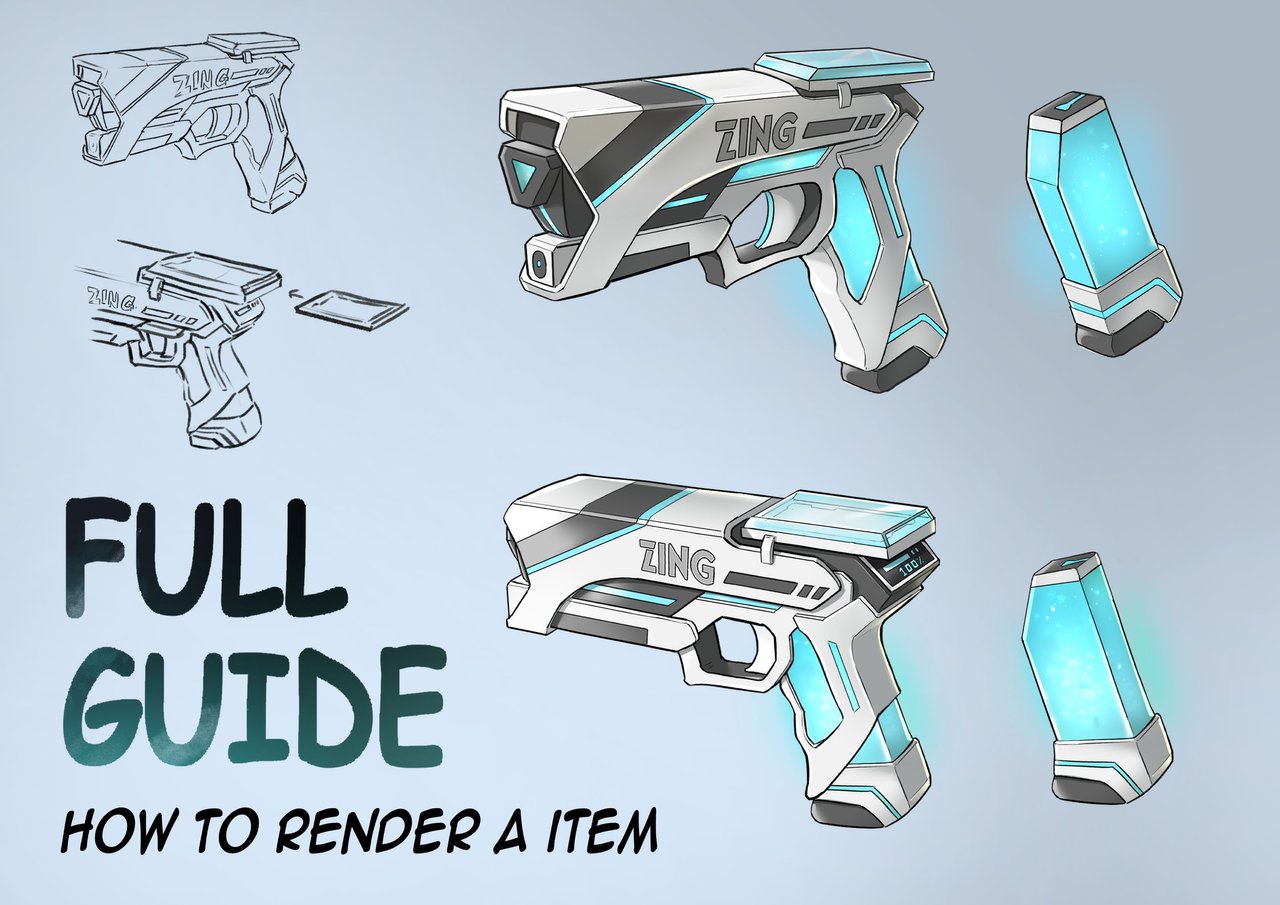
Step 1: Reference and Sketch
Find references to inspire your item. Sketch a rough outline, focusing on capturing its unique features.
Step 2: Base Color
Infuse life into your item by adding a well-balanced base color. Pay attention to the color ratio, experimenting with textures and patterns to amplify its overall visual appeal.

Step 3 and Step 4: Line Art with Perspective Grid
Lower the sketch opacity and craft clean line art using a perspective grid. This technique ensures that your item possesses a solid structure, especially when it involves intricate details. Bring back the base color to maintain vibrancy.

Steps 5 and 6: Shadows and Material Presentation
Using "Multiply" layers with a subtle gray color to introduce shadows, enhancing the depth of your item. Use a soft brush on a "Glow Dodge" layer to illuminate elements like electricity ammo, making them visually captivating.

Last Step: Touch up and color testing
Adding an "Overlay" layer to apply highlights and reflective light, adding a touch of realism and material presenting. Also adding a light color with softbrush to let the ammon look glowing. Explore different color variations to discover the most visually captivating combination.

Tools Used:
Hardware: Wacom Intuos Pro
Software: Clip Studio Paint Ex
Original
Some sharing for perspective:
At college, I practice for drawing perspective for a long time. This method allowed me to sketch a solid and accurate foundation for my items, ensuring a more realistic and visually appealing result.


Comments